We’ve all been there. Your equipment isn’t working—perhaps your espresso machine went down in the middle of your morning rush, and all you can do is apologize profusely to customers as you wait for a technician to arrive. But when, at long last, they fix the problem in a matter of minutes—seconds even!—you ask yourself, “Is that it? I could have done that!” To add insult to injury, not only are you out hours of sales, but you have to shell out a few hundred dollars for a seemingly easy fix, something you wonder if you could have done yourself.
My road to life as a coffee tech was born out of these moments. I used to fret and worry about what was happening with our equipment, just to discover that many issues could be solved by adjusting a bolt or replacing a screw. And now, as a technician, I see many shop owners and baristas struggling with the same minor hiccups, things that can slow down or halt service, but that can be easily fixed with just a little bit of know-how.
Here are five simple fixes this tech says you don’t need a tech for:
Don’t Reach For Your Toolkit Just Yet
Before we get into the nuts and bolts of equipment fixes, there are two general principles you should remember for all coffee equipment repair procedures:
Respect Your Equipment
By the very nature of how they work, coffee equipment can be dangerous to fiddle with if you don’t know what you’re doing.
- Most equipment should be unplugged before you begin work. Some equipment, like the espresso machine, can stay on for non-mechanical fixes, but you should turn off anything you need to open to work on.
- Turn off the water source if your equipment is connected to plumbing.
- If you need to do a mechanical fix on an espresso machine, turn it off, unplug it, turn the water off, and depressurize it by opening the steam valves until no steam is coming out.
If you see a piece of the machine that touches water, assume it will be boiling hot. If you see a wire, assume it carries 220 volts of power. You need not fear your equipment, but you must respect it.

Read and Keep your Manual
Technical manuals for machinery make for dull reading material, but manuals are essential for keeping your gear running correctly. Manuals will have troubleshooting tutorials, explanations of error codes, and, most importantly, programming guides and parts diagrams.
If you don’t have your machine’s manual, find the plate or sticker on the machine with its serial number. Find the make and model number on that sticker, and enter “[machine make and model] manual” and “[machine make and model] parts diagram” into your favorite search engine. You should be able to find copies of your equipment’s manual—save them as PDFs on your computer.
One: “The Grinder Won’t Grind!”
No matter what, if a client calls me and says that their grinder won’t grind, these are the first steps I take:
- First, I’ll see if the grinder’s thermal safety breaker has been thrown. Most grinders have a breaker attached to a thermal sensor, and if the grinder overheats, the breaker is thrown, and electricity is cut to the motor. Sometimes the breaker gets thrown because of a larger problem, like a foreign object stuck in the burr chamber, but sometimes it gets thrown because you’ve just ground a lot of coffee. If you don’t know where the breaker is, check your manual.
- If the thermal breaker isn’t thrown (or resetting it doesn’t help—sometimes an overheated grinder needs a moment to cool down), I’ll empty the hopper, set the grinder to its coarsest setting, and turn the motor on. While the motor is getting power, I’ll move the grind adjustment dial between the coarsest and second coarsest possible settings. If something is stuck in the grinding chamber, oftentimes, wiggling the burrs for a few seconds while the motor tries to run will dislodge it. If this works, hooray! Run some grinder cleaner through the machine, and you’ll be on your way. If it doesn’t, your grinder will probably need to be disassembled to be fixed.
Two: Make Sure Everything Is Turned On
This might seem like a condescending piece of advice, but the following two things are facts:
- It can be surprisingly tricky to fully turn a piece of equipment on.
- I regularly get calls from smart and capable people where the solution is “turn the machine on.”
When your grinder isn’t responding to your button presses, or if your brewer appears to be operating, but the coffee is cold, or if the “ready” light on your espresso machine never illuminates, it’s worth double-checking that everything is properly turned on. And it’s not just a matter of power supplies: water lines can be turned off for any number of reasons, and it’s super easy to think that a machine is broken when the water is just turned off.
Many machines have multiple knobs and settings that need to be activated to turn them on. Many older espresso machines will have one power switch that powers the machine’s electronics and another that powers its heating elements. Some batch brewers have mechanical power switches on the back for general power and buttons on the front that power the brewer controls. If you’re unsure if your machine may or may not have confusing “on/off” controls, break out the manual and have a looksie.
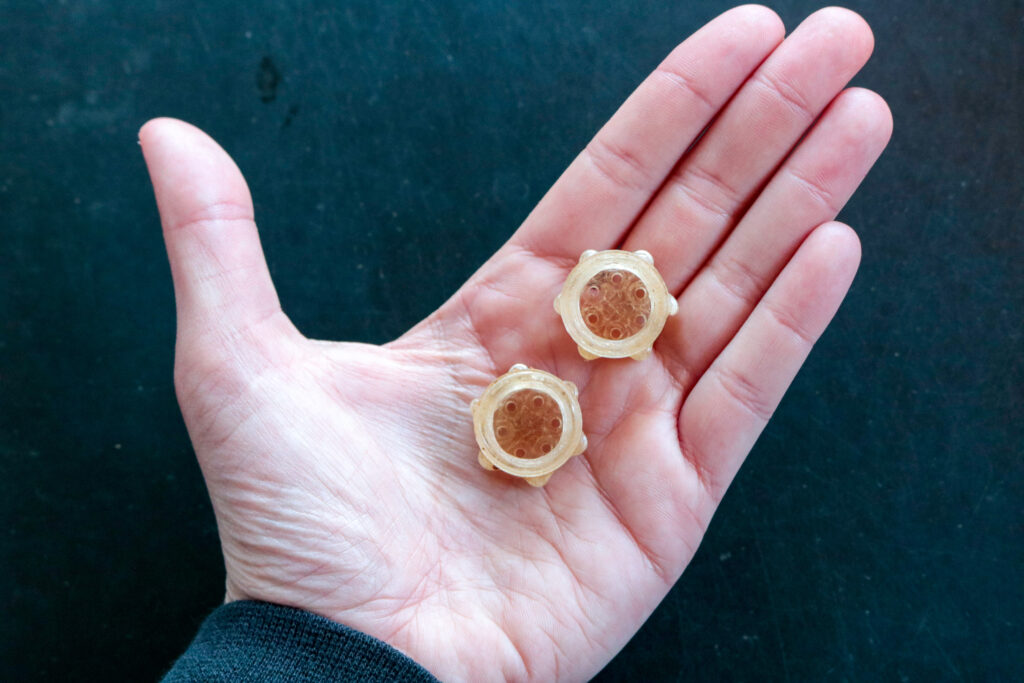
Three: Clean The Sprayhead
I always feel like the mean dentist telling his patient that they need to floss whenever this problem pops up: a common complaint I hear is, “There’s no water coming out of my brewer or espresso machine sprayhead.” The sprayhead is part of your brewer or espresso machine, where water comes out just above your ground coffee.
A sprayhead issue is one problem that can affect a lot of different processes. If you notice any of the following, it’s time to check your sprayhead:
- Water is coming out of your brewer or espresso machine very slowly.
- Your coffee urns or airpots aren’t fully filling when you brew.
- It’s taking a long time for your machine to pull a shot of espresso, specifically if you notice this problem in one particular grouphead/
- You see dry spots in the brew bed.
All these problems can be attributed to low flow rates. Sometimes this has to do with flow jets that need to be replaced or brew valves that aren’t firing correctly, but often it’s just because the sprayhead is clogged with gunk.
The good news: sprayheads are incredibly easy to clean. If you remove the sprayhead and it’s covered in brown or black gunk, that’s old coffee. Soaking the sprayhead in a hot solution of coffee machine cleaner will remove those stains quickly. If your sprayhead is covered in something white and hard, those are hard water deposits—you’ll have to descale the sprayhead with either a descaling solution or citric acid. Get your sprayhead nice and shiny and pop it back in place. If you still have problems, it might be worth calling the pros.
Four: Change Your Water Filter
At some point, you’ll need to change the water filters that provide water to your machines. How often you should swap out your water filter depends on your usage and the water filter capacity, but changing them every six months is generally an excellent place to start.
If you notice the flow rate has slowed (and you’ve already cleaned your sprayhead), look at your water filters. Many techs write the date they were changed somewhere close to the filters—if you notice it’s been more than six months since they were last swapped out, it’s probably a good idea to change them.
Some filters work differently than others, but most have a standard method for how to change them. Before you take your water filters apart, read your manual. If you don’t know how to change a water filter, here is a video I made demonstrating how it’s done.
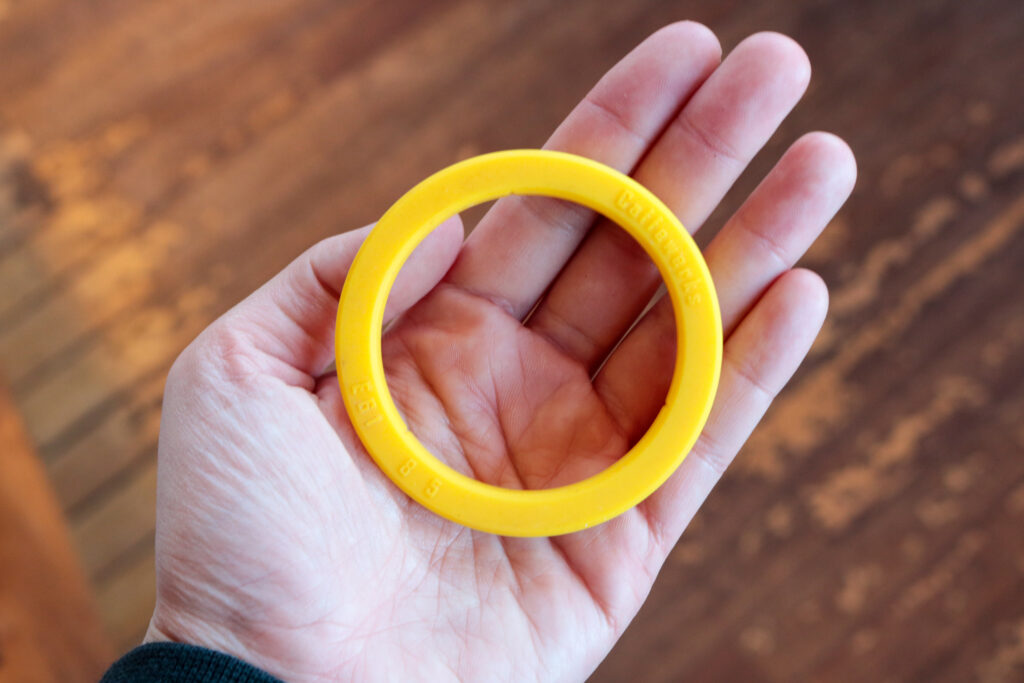
Five: Change The Gaskets
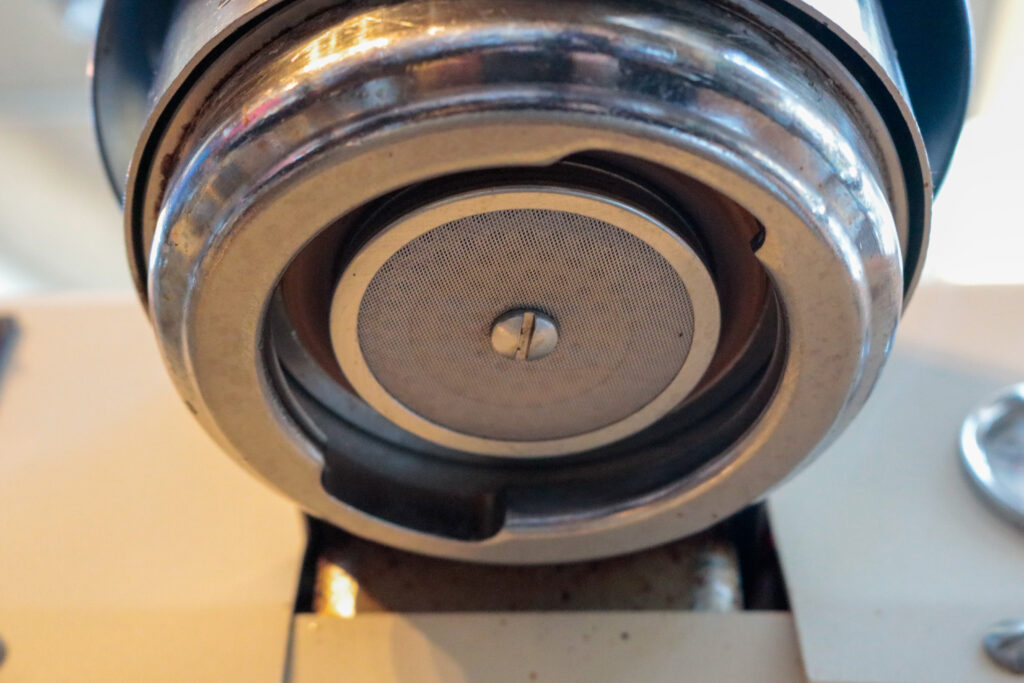
Have you noticed drips or sprays coming from around the sides of your group head? Are you hurting your wrist from how hard you need to crank your portafilters into the group to get a good seal?
The gaskets in an espresso machine create a seal between the grouphead and the portafilter—they are parts built to break rather than last. I recommend changing your group gaskets every three to six months. To replace them, you’ll need new gaskets, available from your machine’s manufacturer or a third-party reseller like Espresso Parts, and a hook pick. I recommend a 90° hook like the one in this set. Food-safe lubricant like DOW 111 is helpful but not necessary.
To replace your gaskets, take the portafilter out of the group, then the dispersion screen (note: if you’re replacing gaskets and buying new parts anyway, it also might be a great time to replace your dispersion screens). Stick the business end of the hook into the old gasket, rotate the hook so that the handle is perpendicular to the gasket, and pull straight down towards the drip tray. If your gasket is old and worn out, it will likely come out in multiple pieces (gaskets harden over time), so repeat this step until there’s no more old gasket left.
Once the old gasket is gone, lubricate your new one and push the new gasket into the space where the old one was. Once you’ve got it wrapped around the sprayhead in the group, take the filter basket out of your portafilter, and put the portafilter into the group like you’re going to pull a shot. This will fully seat the gasket in place.
If you can’t put the portafilter back in place, find the bits where the new gasket is sticking out and poke them in with a flathead screwdriver or another blunt instrument that won’t poke into or tear into the new gasket. Once you can successfully put the portafilter in place, you’re done! Enjoy the next few months of leak-free espresso brewing.
Of course, if you need clarification on something, call a tech. They might be able to walk you through easy fixes on the phone, but it’s always better to be cautious than to risk breaking an expensive piece of equipment. But I hope that by laying out some of the most common issues, you feel empowered to troubleshoot problems and keep your shop running smoothly!