Say Ciao To Summer Tomatoes? Not yet!

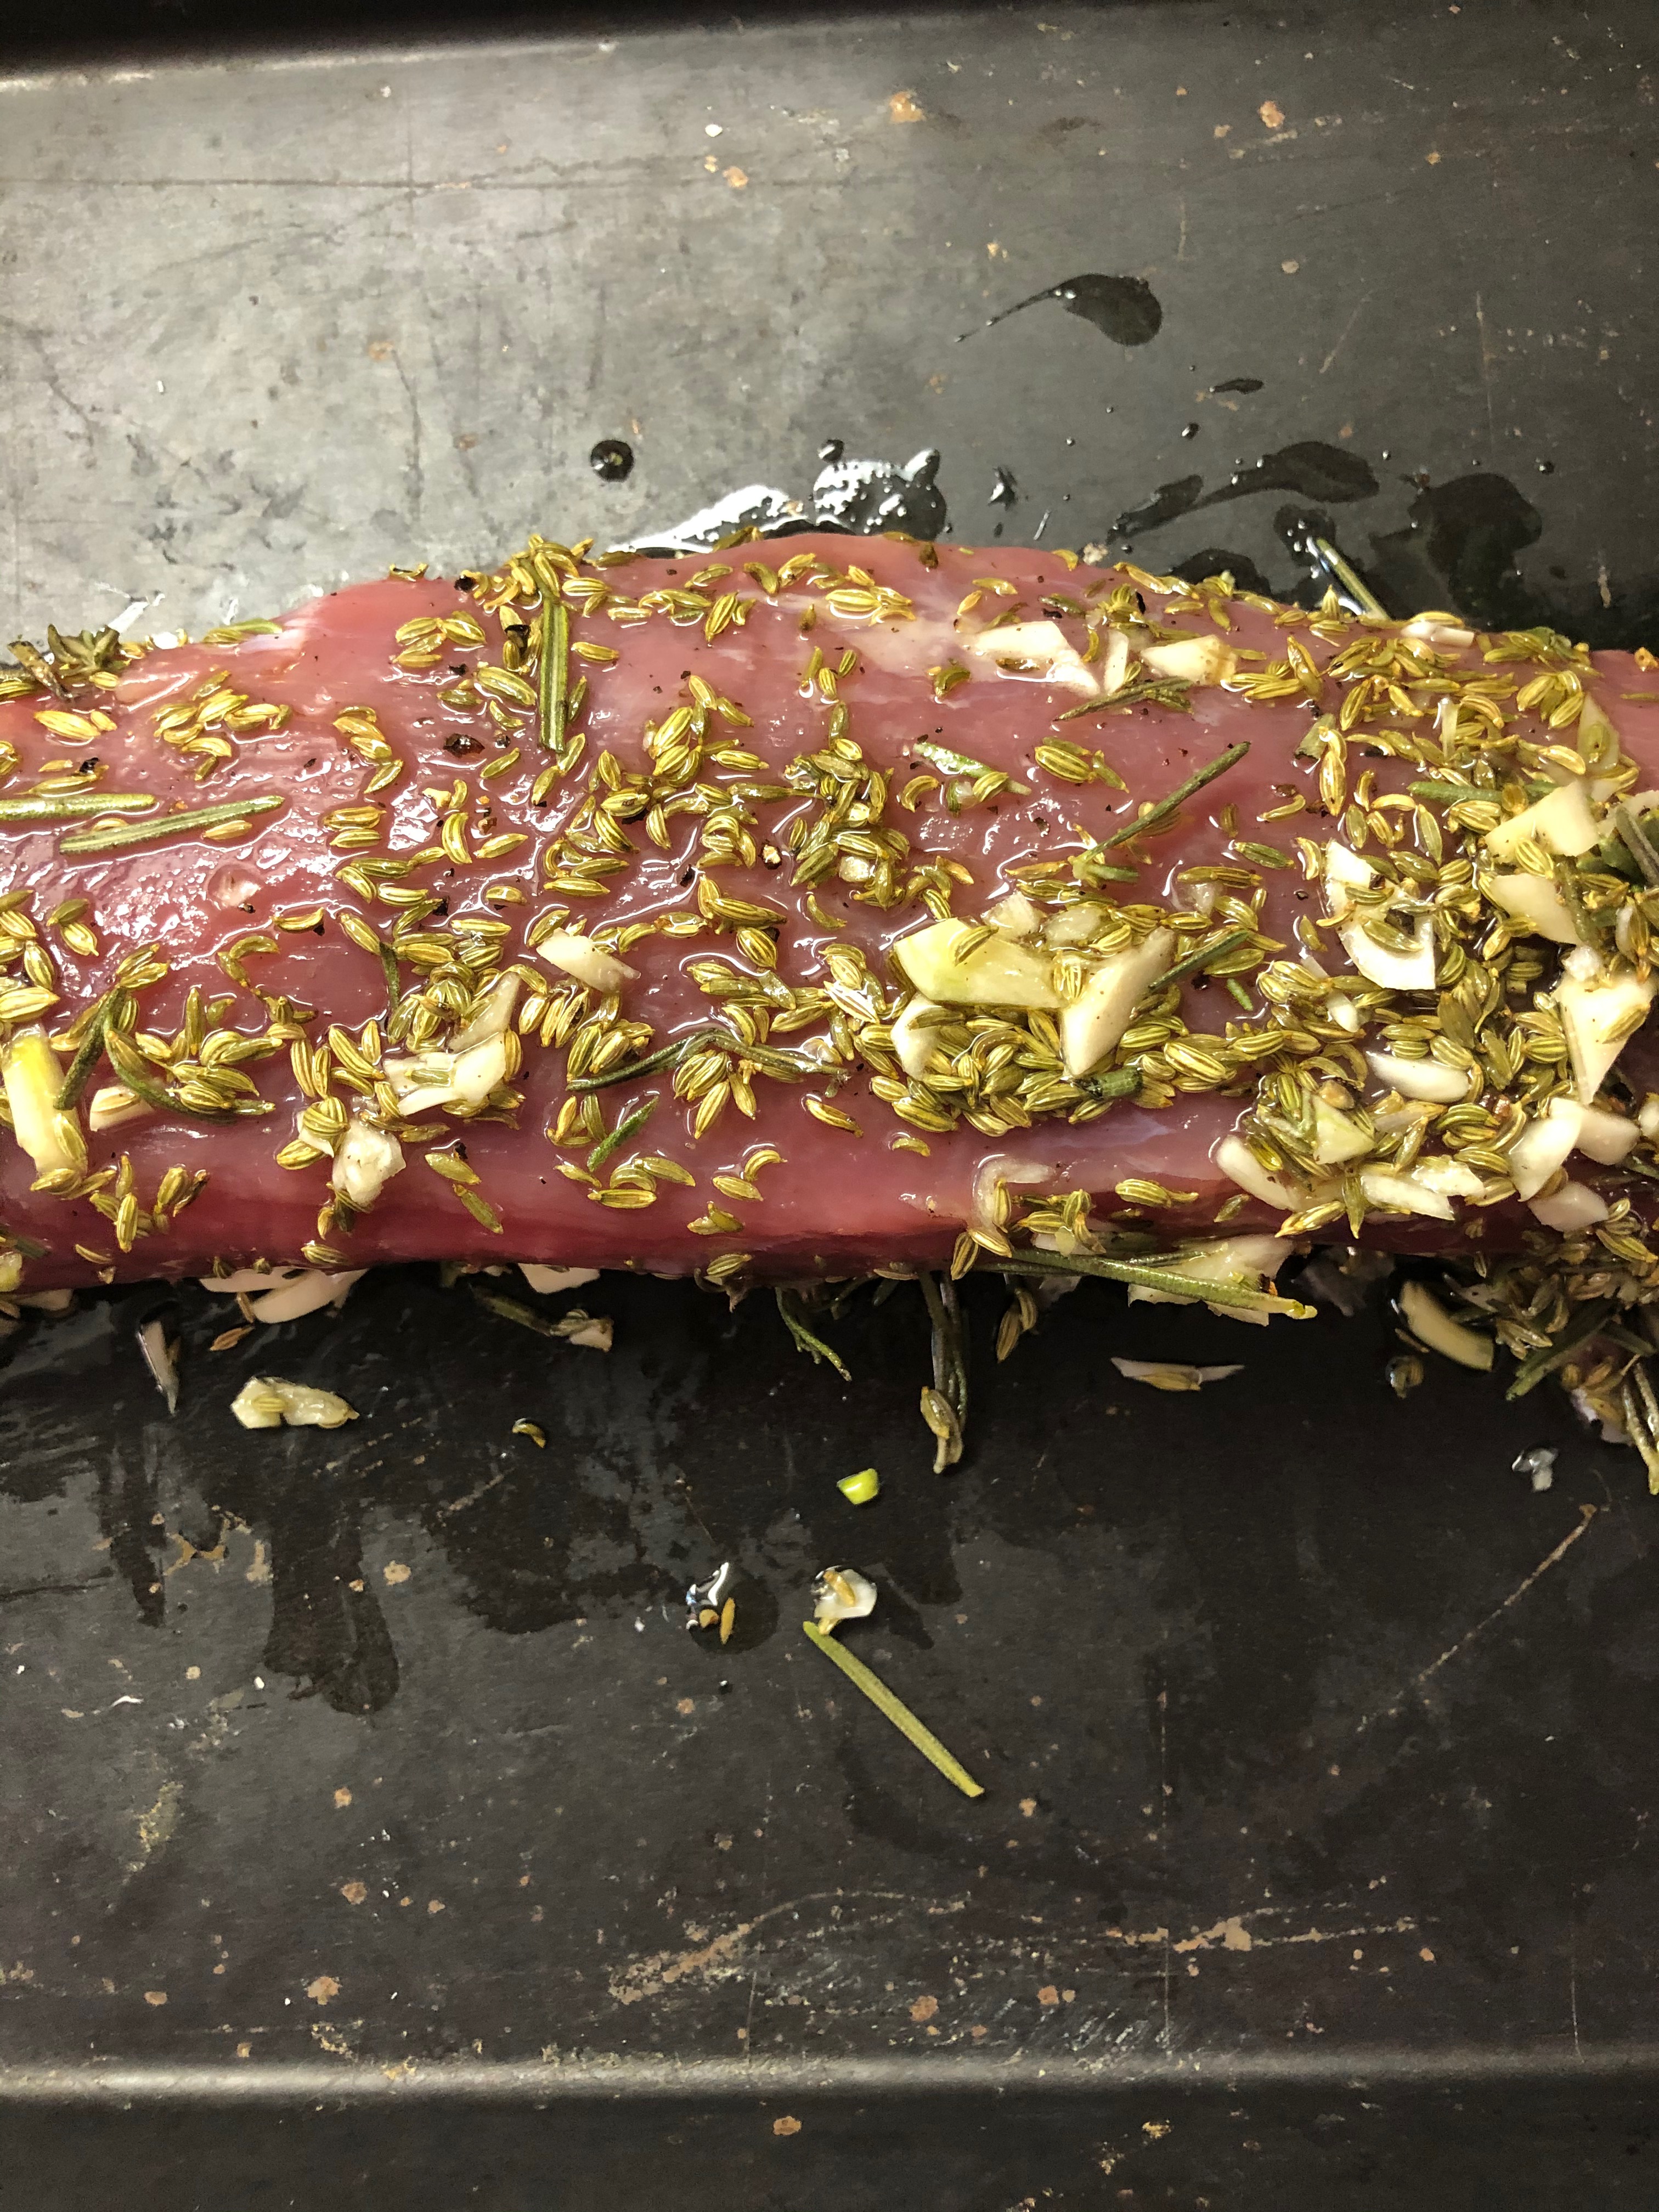
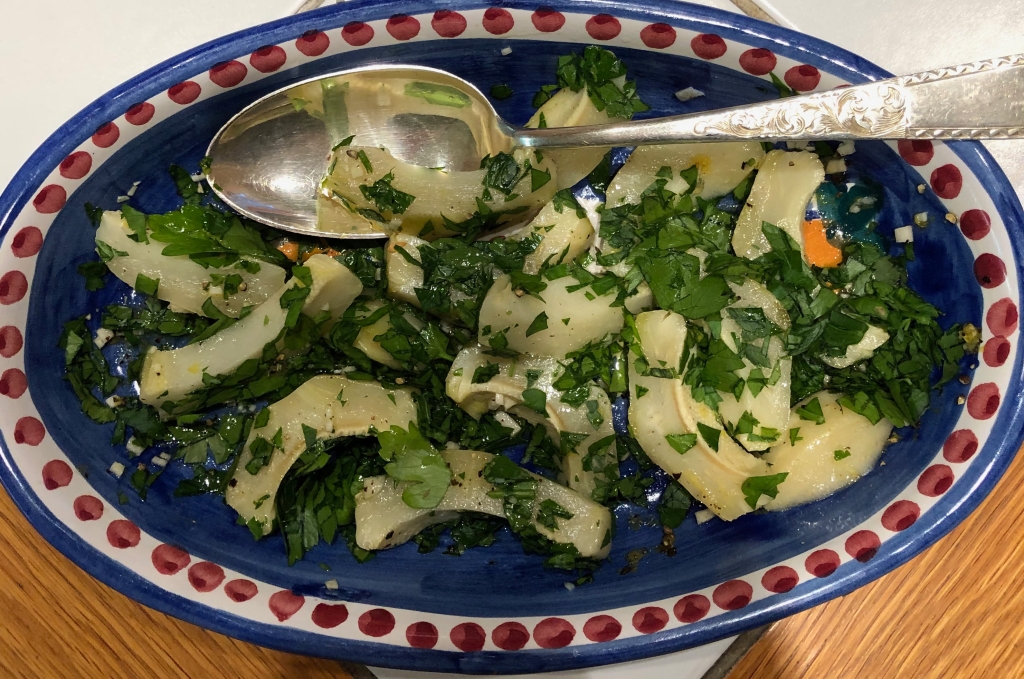
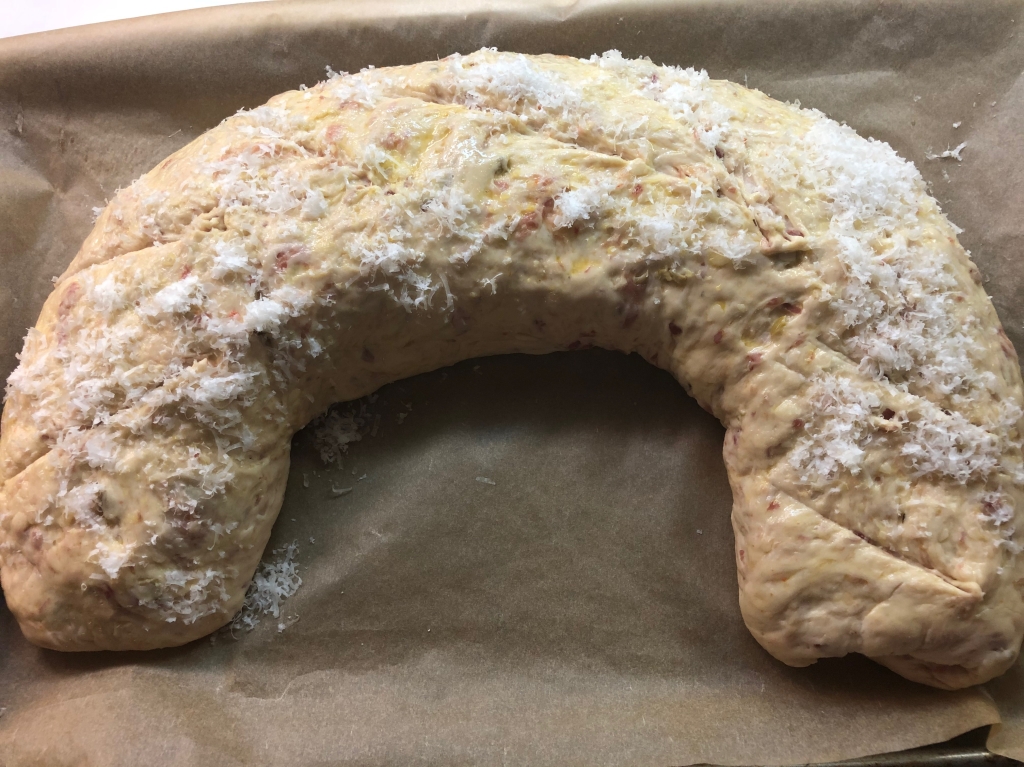
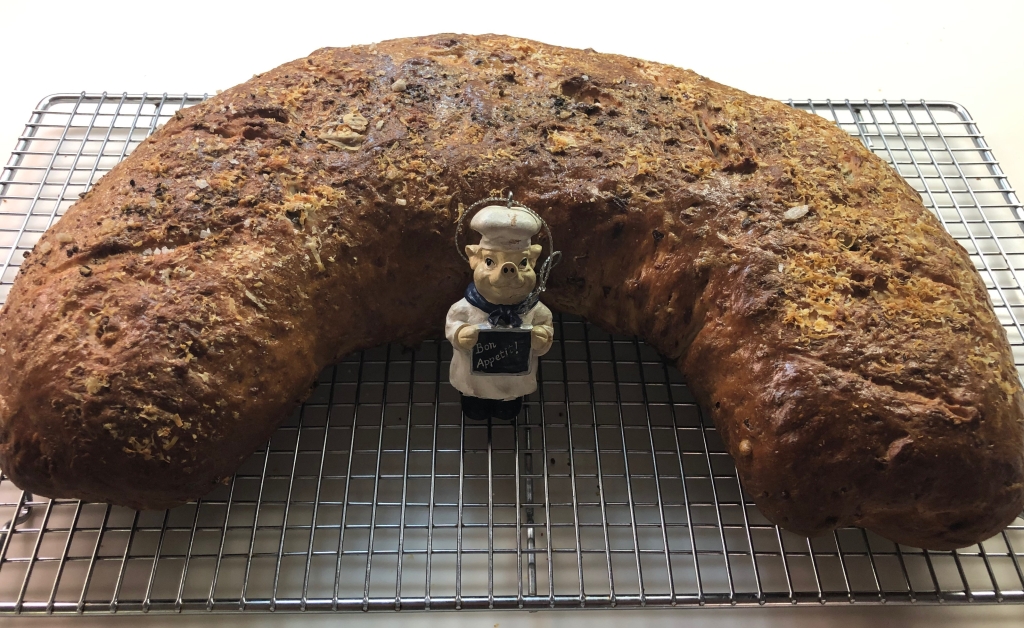
In my never-ending attempts to connect with my Italian roots, and in my continued efforts to be a good citizen and not waste anything, I have concocted this recipe after looking at several sites to come up something doable. It is a bit time consuming but read on, it will be so worth it, I promise. Besides, what else are you going to do? Binge watch yet another series on MHZ? Clean another closet? And the beauty of this project is that has a real Zen effect, for me anyway. When was the last time closet cleaning had that effect?

Back a bit ago (September 2018, I guess more than a bit), I did a post on making tomato sauce from scratch using the end of summer greenmarket bounty. This is a kind of an epilogue to that post. I have taken to removing the skins from the tomatoes before actually cooking them down to make the sauce because after doing the pureeing, there was a big mess of skin and seeds and it became sort of a PITA to clean up. The last few times I made sauce this summer, I sliced a cross in the end of the tomato and removed the core at the top and blanched them in boiling water for 10-15 seconds. After that time seconds, I removed the tomatoes and placed them in a bowl of ice water to cool. The skins came off without an iota of trouble, and my cleaning mess was halved.

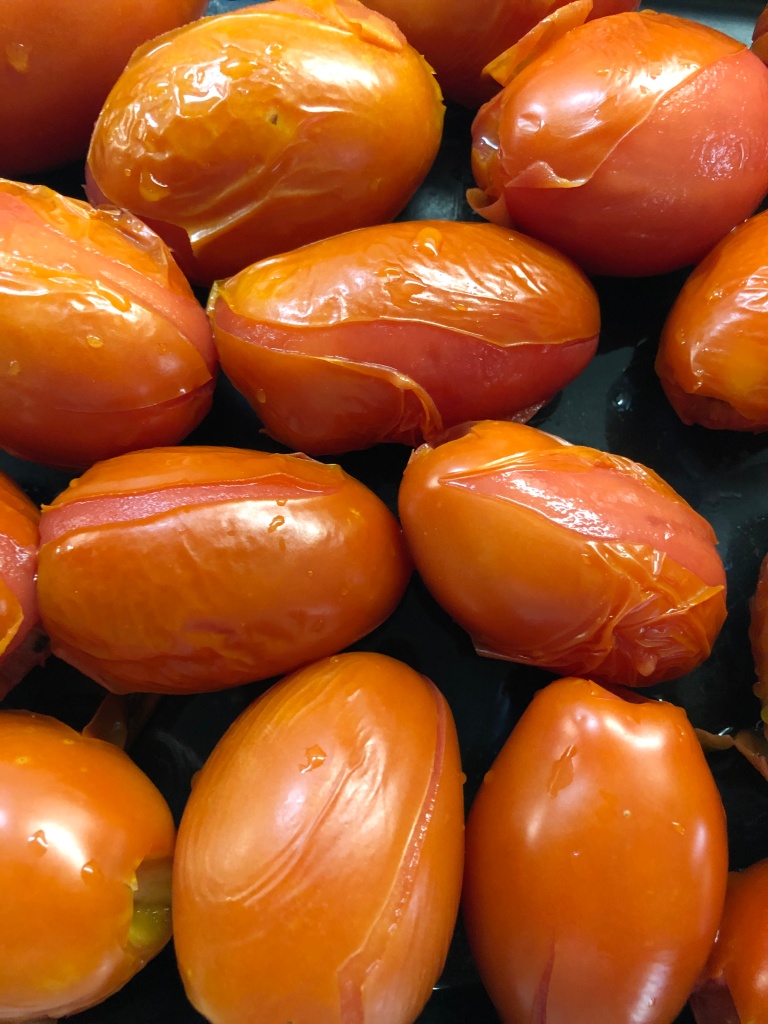
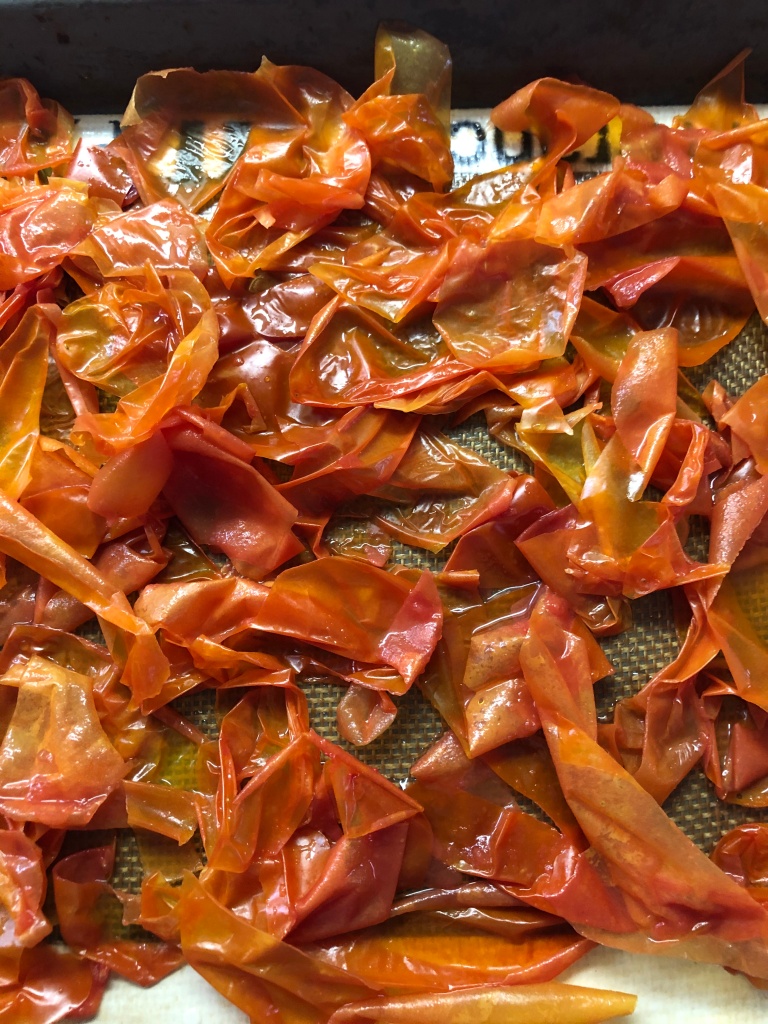
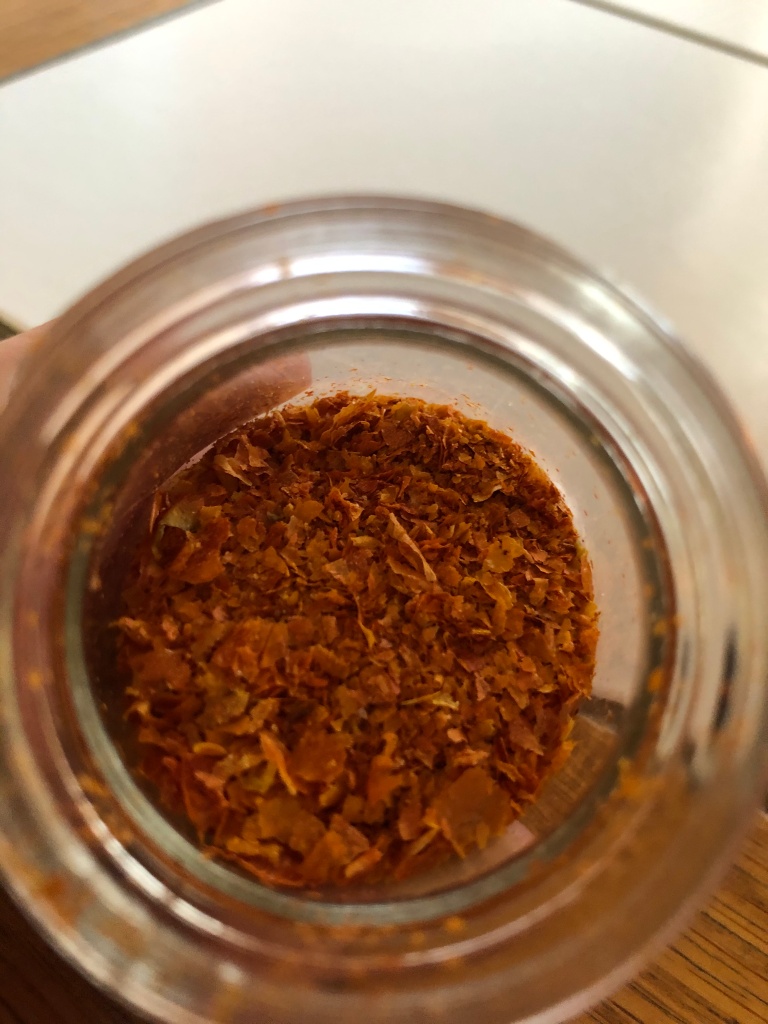
But then I started thinking, there must be a use for those skins. So searched the web and found a myriad of ideas. This encapsulates all of them. After removing the skins, place them on a sheet pan covered either with parchment paper or a Silpat. Try to keep them as separated as possible. If you have blanched them right, the skins will come off in sheets and that will make it easier for you. Place the pan in a 250 degree oven and let them dry completely (the whole process will take 45 minutes to an hour (if you use a convection oven, slightly shorter). The skins will shrink, check them periodically so that they do not burn and rotate the pan occasionally (Some suggested to use the microwave, that procedure did not work for me). Make sure the skins are dried, think Cape Cod Kettle Chip dry. When completely dessicated, let them cool and put them into a food grinder, or use a mortar and pestle to grind. Add a touch of salt if you want. There you have it, powdered tomato topping. With the dregs of the tomato made by your own hands, and the satisfaction that comes from doing good for the earth. Plus the added benefit of sauce which you can freeze for those cold months to come.

Its uses? It is a seasoning. Sprinkle it atop of linguine with white clam sauce for a touch of color. Sprinkle atop sliced mozzarella with a bit of oil, cheater Caprese. Sprinkle in eggs to add zing to omelets.

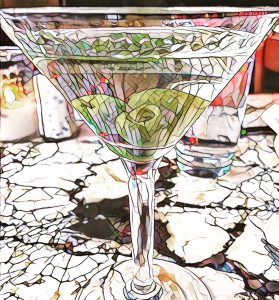
Or……rim glasses for Bloody Mary’s. Your guests will thank you!

PEPPERS PEPPERS PEPPERS

August. The top month for produce. Everything coming into the green markets. All those gorgeous tomatoes, the fruits, eggplants of every shape and size. And peppers. So many shapes. So many sizes. So many colors. So many types. I love roasted peppers. Roasting peppers was the first cooking skill I learned. Put peppers under broiler, turn when blackened, take out of oven, put in paper bag to steam, clean skin, put in jar, eat. From opening the oven door to ingestion, probably an hour of mindless work, but so satisfying. But seriously, how many roasted peppers can you eat?

I saw an article on seriouseats.com about shishito pepper cream. I love shishito peppers but the only way I have eaten them is dry roasted on a cast iron skillet until softened and topped with coarse sea salt. Mind you, that is a really delicious nibble, but again, how many times can you eat them (especially if your other half doesn’t eat them)? This cream thing intrigued me so I gave it a try. Delicious. For eight medium sized peppers you will need a sliced clove of garlic, a sliced shallot, a tablespoon of olive oil, 1/4-1/3 cup of heavy cream, a tablespoon of Parmigiano Reggiano (more if you love cheese), and grated nutmeg. Thinly slice the peppers crosswise. Heat the olive oil over medium flame. Add the peppers along with the garlic and shallot and saute until softened. (A nod to Jacques Pepin, I add a bit of water to the pan at the start when sautéing vegetables. It melts the vegetables before they brown too much and when the water has evaporated, the veggies are softened enough so that they are perfectly cooked. The man is a genius.). When the mixture is done, add the heavy cream and turn the heat up a bit, you want to boil the cream down with the peppers to make a sauce. How thick or thin is a personal choice, I went thicker, will explain why in the next paragraph. When the mixture has reached your desired consistency, take off heat, add cheese and nutmeg. Stir. It can be used right away or refrigerated.

Now I have this thick beautiful and creamy butter like sauce. How to use you ask? Well, I had also bought Nardello peppers (https://blog.gardeningknowhow.com/tbt/jimmy-nardello-italian-peppers/) and had some green shishitos left over so I dry roasted both. I also had ciabatta bread which I grilled rubbed with garlic topped with a light brushing of olive oil. I then buttered the bread with my thickened shishito pepper cream and topped with the roasted and chopped Nardello and Shishito peppers. Can be used as a spread for any sandwich. Think grilled eggplant. Think sliced tomato. Think whatever you like!

There you have it. And it being August, open a bottle of Rose’ and be happy.

CHEATER PORCHETTA

I saw this recipe on “ITALIAN SONS AND DAUGHTERS” website so I do not claim it as my own. Having said that, I thought it was too, too good not to share. I love porchetta but it takes forever to make and is usually too large for dinner for 2-4 people. This recipe is ingredient friendly, easy to prepare, and perfect for Sunday dinner or a small dinner party. You will get all the flavor of the larger roast plus all the crispy bits from the pork skin. What you need is a tablespoon of fennel seeds, about a tablespoon of chopped garlic (more or less according to your taste) and a garlic head sliced in half across the equator (optional, but why not??), a tablespoon of chopped rosemary and a few sprigs (3-4) set aside, olive oil salt and pepper, a pork tenderloin and the thing that makes it porchetta, 4-5 slices of BACON!

Start by combining the fennel, chopped garlic, chopped rosemary, salt and pepper, and olive oil to make a paste. Rub the mixture over the pork loin. Place the rosemary sprigs onto an oiled baking dish and place pork loin on top. Now wrap the loin with the bacon slices making sure to tuck the ends under the pork. Place pork into a 425 degree oven, if using convection to roast, use the temperature for your oven. Roast for 30-45 minutes depending on style of cooking, but start testing at 30 minutes. You want the internal temperature to be 145 degrees. Let rest tented for 10 minutes before serving. See? Easy.

I paired it with a warm snap pea and purple potato salad and some grilled asparagus, you can come up with your own sides, even some grilled apple or strawberries would be nice as it is the season.

Don’t eat pork? Try it with Salmon. Bacon too much (said no one ever)? Wrap it with prosciutto. Leftovers? Sandwich with onions and roasted peppers.

Comforting Sunday dinner. Don’t forget the wine.

Roasted Rapini

It is a beautiful Saturday here in quarantined Brooklyn. Totally Spring. And in a sign that some normalcy is trying to return, my dry cleaner was opened so I was able to ransom garments that I dropped off a month ago, like having a new wardrobe. Our Greenmarket is open on Saturdays as well, so I walked up to see if anything was available. Lo and behold, green things are starting to appear as nature does its thing with or without face masks.

One of the vendors had beautiful bunches of broccoli rabe and for the first time in 6 weeks I had a craving for something that wasn’t a potato chip or a bottle of wine. This has to be the easiest, freshest, and tastiest thing to make on the spur of the moment.

aren’t they beautiful?

So before you I have presented the ingredients. Rapini (or broccoli rabe), garlic, crushed red pepper. You will also need olive oil and flaky sea salt to taste. Everything is QB (quanta basta, or as much as you need or want). First blanch the rapini in boiling water for about 5 minutes. This will soften the stems. Refresh in ice water and drain. Heat oven to 400 degrees. While oven is heating, slice the garlic as thinly as you can. Cover a rimmed sheet pan with aluminum foil (read easy cleanup) and place the rapini on the pan alternating stems and tops for even cooking. If necessary, use two pans, you don’t want to crowd the pan. Add the olive oil, the shaved garlic, the crushed red pepper, salt to taste, and toss. Roast 10-15 minutes. That is all there is to it. If the stems are still tough, cut them from the tops, and place back into oven covered with some aluminum foil to finish. Add lemon juice if you want, or a splash of red wine vinegar. That’s the healthy part.

When I was growing up, my grandmother would make me a sandwich on our Sunday visits. Kaiser roll, some pork cracklings from the rendered fat back used to fry the meatballs for Sunday gravy, and some broccoli rabe. As I was roasting the rapini, I thought of that dish. I had some bacon in the fridge which I chopped down into small pieces and fried. Dipped a Martin’s potato roll into some of the bacon fat, added a few pieces of crispy bacon, a few slices of shaved pecorino cheese, some of the garlic slices from the rapini and toasted my grandmother. Not so healthy, but oh so delicious.

Other things you can do: chop it, add some of the cooking oil and bacon and toss with pasta; top with fried egg; serve at room temperature as a side or salad adding some lemon zest; chop and add to omelettes.

So grab your mask, go for a walk, enjoy the day, look for the rapini, and be grateful for another spring.

RETRO NIBBLE

When I decided to put this blog together whenever that was, I made a list of things that would be part and parcel of the postings, items I had made for the beach, stuff I put together for last minute cocktails on the roof in Brooklyn, things that were easy to make and didn’t require a lot of ingredients or fussiness.

Fast forward to “the siege”. In my pantry, I had two things for a post I was going to do back a bit, but my husband became ill and then time just got away from me. Tonight, two safe friends who live in the building but are staying out of town currently are coming for dinner. They need to come back to Brooklyn for MD appointments. Actually I think they are stir crazy and want to come in to be somewhere else, but I digress. Normally I would make a nice dinner but they begged me for takeaway Chinese food, and on GrubHub I have actually found a restaurant I like, so Chinese it is. But a menu from the 60’s to be sure, House Chop Suey, Egg Rolls, Fried Rice, Shrimp and Lobster Sauce, Egg Foo Young, Spare Ribs, the quintessential non Chinese, Chinese take out from King Wah we had growing in Huntington Station. I am sure my Chinese-American friends are cringing at the thought of calling this “Chinese”, but those items are like Chicken Parmiggiano to an Italian-American. They don’t make it in the old country, but it sure is good eats if prepared well.

So for this “retro” Chinese dinner, I decided to pull out the two items to have with our cocktail hour. I give you:

Cube the spam, place in skillet, brown well, top with pineapple chunk, and add a cute toothpick. End of recipe, end of story. Want to jazz it up? Add a strip of Nori and call it Hawaiian Sushi. World’s easiest and most retro nibble, perfect for the craziest of times.

Now for the retro cocktail? I’ll take Manhattans……..

Braised Radishes

This is a riff on that beautiful appetizer seen so often in the South of France. If you have ever been, you will know that radishes are served with fresh butter and flaky salt (and a bottle or two of Rose’).

I was looking for a different side vegetable for my Easter dinner, and I had some radishes in the fridge which were a bit tired looking, so I decided to reinvent that appetizer to serve as a vegetable for my meal. 4 ingredients including the water and the salt. The other two are radishes and butter. The whole process start to finish takes 10 minutes max. The result is a colorful and sweet vegetable that will surprise even the pickiest of eaters (read my husband).

Start with clean, clean, clean radishes. They are always very dirty when you purchase them, rinse them in several changes of cold water to remove the grit. Remove the greens and set aside. I like to leave the little squiggle things at the end and a bit of the green stem, but you can remove as you like. Try to keep them all the same size, if need be leave some whole and some sliced. It will make the cooking more even. Place your radishes in a sauce pan that has a lid, add butter (depending on how many radishes and how much you like butter, this is a very free flowing recipe) and a 2-3 tablespoons of water. Cover and bring to simmer over medium heat. When the radishes are softened so that a knife or cake tester goes through with some resistance, remove the cover and raise the heat to boil. The water will boil away and leave only the melted butter which will cause the radishes to brown. When finished, remove from pan, sprinkle with flaky sea salt and serve. That’s it. If you really want to go over the top, and you happen to have it on hand, you can replace the butter with either chicken or bacon fat, or my personal favorite, duck fat which I always have in the fridge because, well you never know when you want duck fat potatoes. Photo start to finish below.

Now about the greens. They can be served with a simple red red wine vinaigrette as a green along with the radishes and your meal. Or you can puree them with some walnuts and olive oil, a bit of red pepper flakes and a clove of garlic and make a sauce. Use them, they are tasty, peppery and a bit like arugula.

One more thing, don’t forget the Rose’.

Mushroom Moustaches.

I saw an episode of Simply Ming a bit back and while the entree was a fish or lamb or something else delicious, the thing that caught my eye was the crispy shitake mushrooms he made as a garnish.

So because I always have mushrooms in the fridge, and because yesterday was rainy and cloudy, I had binged Season 2 of Victoria, and I was beginning to talk to myself alternating between a cockney accent and a German accent, I decided it was time to try these little beauties.

Wipe the mushrooms clean with damp cloth or paper towel. Remove the stems. If you have OCD, you can bag and place in freezer to use for stock at some point. Yes, I do that. Slice them as shown above. In a skillet, add about 1/4 cup whatever oil you have. I use Grapeseed or Safflower because of the high heat content. You are going to want a high heat to make them crispy.

even more so now!

Heat your oil until shimmering or use the base of a wooden chopstick or toothpick to see if bubbles are accumulating around the bottom of the stick. When the appear, you oil is hot enough. Add the mushrooms a few at a time, and let them brown. They will. the whole process takes about 4 minutes. Pull them out from the oil place on a rack to drain. Sprinkle with salt and pepper or whatever other spice you would like.

They can be served with drinks, as a side, as a garnish, and maybe even dipped in chocolate, although I save that possibility for the pastry chefs out there.

Mushroom moustaches! No razors needed. 🙂

Venetian Memory

The fog on the vialetti. Le piazze piccole. The flying domes of San Marco. The bridges that go to and fro and take you to places that seem to be in the middle of nowhere, and are. All beautiful memories of Venice, especially in my favorite season, winter. But nothing captures my memory more than the food I ate on my many trips. Not in the Piazza San Marco, not the high end ristoranti, but in the alleyways behind the Rialto Bridge, the bacari in Cannareggio and San Paolo, that food. The food the locals ate.

On one of my trips, while drooling my way through the Rialto Market, I happened upon a merchant who was spinning artichokes to uncover the hearts. I have seen this done on a myriad of TV cooking shows, but never IRL. It amazed me that this could be done so quickly because every time I tried to follow the YouTube videos and reruns of Cooking with Lidia to perfect the trick, it turned out to be a lose lose proposition. This person was cleaning and dropping them into lemon water faster than you could spell artichoke. Shaking my head sadly, I just walked away.

Fast forward to dinner. In Trattoria La Madonna (a must if you ever visit Venice), just behind the aforementioned bridge, I saw warm artichoke salad on the menu and decided to order it. Thinking I was going to get grandma’s artichoke which is eaten leaf by leaf, the kind server placed before me a beautiful, warm salad of cleaned and sliced hearts. I had never eaten artichokes this way. These were same hearts I saw being dropped into the water earlier. It was delicious.

I bring you this salad. If you have frozen choke hearts, which is what I use, it is easy and tasty and if you like artichoke hearts, good for lunch or dinner every day of the week. This is what you need.

Frozen artichoke hearts are available in almost every supermarket. I buy mine from Sahadi’s, a Middle Eastern market in my neighborhood. To serve 2 people as a salad or a side, cook 4 hearts in boiling salted water until they are soft when pierced with the tip of a knife. I use a cake tester. If it goes all the way through with the smallest bit of resistance, they are done. While they are cooking, chop a 1/2 clove of garlic (or more if you like) and a big handful of parsley leaves. Zest a half of lemon and squeeze the juice into your serving dish. Add salt and pepper to taste and then add the garlic. When chokes are done, remove from water and drain and dry well. You want to remove as much of the water as possible so it does not dilute the dressing.

Slice them to the desired thickness and while warm, toss them into the serving dish with the lemon juice mixture. Add olive oil to your taste, and top and toss all with chopped parsley. The appetizer/salad/side can be served warm or at room temperature. I did not add crushed red pepper here, but feel free to do so if you want a bit of kick.

And there you have it. It isn’t a visit to the Rialto Bridge, but it sure can conjure up some good foodie memories.

Uncle Joe’s Prosciutto Bread (Stolen from Mommy)-update

I actually forgot to post this piece. So I am posting it today. It isn’t Super Bowl Sunday, but the bread is still makable! Enjoy, albeit a bit late.

So tomorrow is Super Bowl Sunday (in addition to the hubster’s Big Big birthday and the 2 year anniversary of my retirement). I am having the usual suspects for the day and had planned on getting an large Italian hero (kind of like the hubster) as part of the menu. It just seemed like too much of too much which is something I am a star at doing, but then I remembered that my brother makes Prosciutto Bread at the drop of a hat so I consulted with him and between his (read mommy’s) recipe and my insistence of jazzing up every recipe I see, I decided to give it a try. After all, the ingredients can be found in any Italian deli and are generally added to every hero worthy of the name. Plus it has the added benefit of not having all the hams and such drop out of the sandwich with every bite. One more added benefit, if the meats are not your thing, just use the cheese, peppers and olives and give it your own spin! If you are still stumped on what to bring or serve at your Super Bowl gig, try this.

I am using a basic bread dough recipe that works for me, use whichever you are comfortable. In addition, you can certainly go to your local market and purchase pre made dough. However, your ingredients will not rise with the bread so keep that in mind when making. Just fold them in when you are ready to add. I have 1/4 pound prosciutto, 1/4 pound capicollo, 1/4 pound provolone, some homemade roasted peppers and some chopped green pimento stuffed olives. Understand that this is what I am using. If you want to change up the items, please do. More or less of one or the other is ok. Just don’t overload because too much of anything is overwhelming and also makes the bread very salty. Be mindful of using too much cheese as it may leak out and burn. For finishing, you will need an egg beaten with some water and some grated Parmigiano Reggiano to sprinkle on top. The egg will give gloss. The cheese will give crunch. You can also sprinkle, albeit very lightly, some flaky sea salt

To start, chop the meats into small pieces. I used the food processor and pulsed a few times. If you have purchased the provolone in a piece, grate it, if in slices, do the same as the meats. Chop or process the olives and leave the peppers in slices but dry as much as possible. Set all aside. Assemble the bread ingredients according to your recipe. **Directions for store bought dough will be down the page.**

If using a machine with a dough hook, drop the meat, the cheese, and the olives along with the flour and knead all together until fully incorporated. If using a food processor, proceed the same way. If doing by hand, God bless you, just work all into the dough as you knead. DO NOT ADD THE PEPPERS. Set dough aside to proof according to your recipe (generally 1 1/2-2 hours). Trick on when dough ready-touch the side, if indention remains, dough proofed. Punch dough down, knead slightly, and set aside again for about an hour for a second rise.

Now you are ready to form. You can either make a ring or just a loaf depending on what your mood is. **Flatten the dough into a rectangle. If you are using store bought dough, this is when you add your meats, cheese, olives and peppers. If you have made your dough, this is when you add your roasted peppers. With the long side of the dough facing you, place your peppers (meats, cheese,olives) along the middle of the dough piece. Fold the top third of the dough down towards the center and encase the ingredient(s) that you are adding. Then fold the bottom of the dough up covering all. Roll the loaf over so that the seam side is on the bottom. Now form into the shape you want. Place on a parchment or Silpat lined sheet pan, cover with a towel and allow to rest for 20 minutes.

Preheat your oven to 400 degrees. Meanwhile, brush the top of the dough with egg wash and then sprinkle with grated Parmigiano Reggiano cheese. Make a slit along the top. Put into oven and bake for 35 minutes. Start checking after that, if loaf sounds hollow when tapped on the bottom, bread is done. Let cool on rack before serving. If serving next day, allow the bread to cool completely before encasing in plastic wrap.

Eat with your favorite Super Bowl beverage. Cross your fingers crossed that stupid numbers like 2 and 8 (yes, can you say safety?) in the pools come in. Leftovers can be frozen (but there probably won’t be any). Numbers like 2 and 8? There’s always next year.

Waffle Puffs

I have this adorable, lilliputian waffle maker.

I bought it for reasons I cannot give, but it sits in my cabinet and need some attention.

I also have always in my freezer (along with makings for fillings of chicken pot pies and soup dumplings), puff pastry squares which I use for the aforementioned pot pies and other goodies.

This morning, for giggles and other things, I decided to combine the two for breakfast. Lo and behold, I give you this!

The pastry had puffed and gave me, and therefore you, some ideas as I chewed on the crunchy crispy waffle topped with butter and honey.

As you can see, the pastry poofs up and therefore is horizontally sliceable to give you two crunchy, crispy halves. Idea 1. Fill with whipped cream. Idea 2. Fill with ice cream. Idea 3. Fill with jam or preserved fruits. Idea 4. Do all of the above and serve as a wonderfully easy and beautiful dessert. Dust top with powdered sugar to gild the lily.

Idea 5 comes from my genius brother (had to share the photo of the waffle with him). For something savory for a brunch item, replace your biscuits and fried chicken and fill with sausage and gravy. Or creamed mushrooms.

You get the idea, the fillings are limited only by your imagination. And if you can’t be bothered or want something unique for morning coffee, feel free to butter and top with honey. It’s perfect just as it is.