Purpose of this Guide
Here’s the skinny on what we’re looking at in this guide. We’ve got a serious problem in the construction business, folks. Between 2003 and 2013, more than 3,500 good people have been lost to falls. That’s the top reason folks in our line of work meet an untimely end. And out of that number, 1,200 – that’s a full 34% – slipped off roofs.
As a roofer, you’re dancing with danger every day. You’re high off the ground, balancing on ladders, juggling power tools. Then there’s the electricity, the noise, the chemicals. And let’s not forget the blistering sun or the biting cold. These hazards aren’t just scary stories – they’re real threats that can cause real harm, even take a life, if they’re not handled right.
So, how do we keep our hard-working roofers safe? It all starts with recognizing the threats they’re up against. Once we know what we’re dealing with, we can take action. That’s what this guide is all about. It’s here to help us prevent falls and other injuries, limit exposure to dangerous chemicals, and protect workers from weather-related harm.
To give you an idea of what you’re up against, here’s a list of the most common reasons OSHA cited roofing contractors in recent years. t’s a sobering list, from fall protection and ladder safety to scaffold requirements and hazard communication. Remember, the more aware you are of these standards, the better you can keep yourself and your crew safe.
The main offenders in recent years were:
-
- Duty to have fall protection (Standard 1926.501)
- Ladder safety (Standard 1926.1053)
- Fall protection training requirements (Standard 1926.503)
- Eye and face protection (Standard 1926.102)
- General scaffold requirements (Standard 1926.451)
- General safety and health provisions (Standard 1926.20)
- Head protection (Standard 1926.100)
- Fall protection systems criteria and practices (Standard 1926.502)
- Ladder training requirements (Standard 1926.1060)
- Hazard Communication, Standard 1926.59 (referring to Standard 1910.1200)
Plan, Provide, Train
There’s a trinity of steps that can put the brakes on falls and save lives on the job: “Plan, Provide, and Train.” If you’re looking for resources to help you out, the folks over at OSHA have put together a Fall Prevention Campaign chock full of helpful info. You can find it at www.osha.gov/stopfalls.
Now, let’s get down to brass tacks for fall protection strategies in roofing work.
First up is “PLAN”. That means you’ve got to think ahead to do the job right. Sketch out a blueprint for safety that includes the right gear, the right materials, and the right people, trained up and ready to go. Pay attention to the pitch of your roof – it’ll determine what regulations you need to follow.
- Know the pitch of the roof and follow the appropriate standard.
- — Low slope roof – 4:12 slope or less – 29 CFR 1926.501(b)(10).
- — Steep roof – above 4:12 slope – 29 CFR 1926.501(b)(11).
Next, we have “PROVIDE”. This means suiting up with the right gear for the task at hand. Whether it’s the right type of ladder, scaffold, or safety gear, having the right tools in your toolbox can make all the difference.
Last, but not least, is “TRAIN”. Knowing what to do is only half the battle – you’ve got to know how to do it right. Make sure your workers can spot hazards and know the safe way to use ladders, scaffolds, and fall protection systems. Brush up on OSHA’s Fall Protection standards at 29 CFR 1926, Subpart M – they’re there to keep you safe when you’re six feet or more above the ground. Also, make sure you have safe work practices in place to cut down on the chance of falls.
Remember, you’ve got to lead the pack. If you’re an employer, project manager, or supervisor, you’re the one setting the standard. Show them how it’s done and ensure that safety gear is being used and maintained correctly.
Stuck on something? Don’t sit on it. Reach out to your local OSHA Compliance Assistance Specialist or Consultation Program office. They’re there to help, and you can find them at https://www.osha.gov/complianceassistance/cas and www.osha.gov/consultation, respectively. Safety is a team sport, folks. Let’s make sure we’re all playing our part.
Getting Started with Roofing Safety
If you’re working in the construction industry, you’ve got to have a safety program, no ifs, ands, or buts about it. Contractors and employers on the construction beat need to stick to the rules in 29 CFR 1926, Subpart C, General Safety and Health Provisions, as well as other relevant standards. These standards lay out your duties as an employer to start and keep a safety program that includes regular inspections of work sites, materials, and equipment (29 CFR 1926.20(b)(2)). Plus, it’s your job to ensure your workers are trained to spot and steer clear of unsafe conditions (29 CFR 1926.21(b)(2)). And don’t forget, training should be in a language and style that your workers can grasp.
Fall Protection Requirements and Training
Now, let’s talk about fall protection. Falls are the number one reason roofers end up hurt or worse on the job. If you’re six feet or higher above a lower level, you’re at serious risk for injury or fatality if you take a tumble. Skimping on fall protection, using damaged equipment, or setting up incorrectly can make falling from height even more likely.
Fall protection training isn’t optional. If your workers might be exposed to fall hazards, they need to know the drill. This training, delivered by a competent person, should cover how to spot fall hazards and the right procedures to keep them to a minimum (29 CFR 1926.503(a)). Your workers should learn how to check, put up and take down, and maintain the fall protection equipment they’ll be using on the job (29 CFR 1926.503(a)(2)(ii)). And remember, if conditions or equipment change, or if a worker’s performance shows they need a refresher, it’s time for retraining (29 CFR 1926.503(c)).
As an employer, it’s your responsibility to document that training has taken place as per 29 CFR 1926.503(b) – Certification of Training. To get more details on what should be included in fall protection training, check out 29 CFR 1926.503 – Training Requirements. Remember folks, safety isn’t just a box to check. It’s a commitment that can save lives.
Safety is an ongoing commitment, and it’s one that extends to every square inch of your workspace. Whether you’re striding across a factory floor, navigating the carpeted corridors of an office, balancing on a scaffold, making your way across a catwalk, ascending a fixed ladder, or tackling a flight of stairs, you’re navigating terrain that has the potential for a fall. And, given that workplace falls account for nearly 20% of all debilitating occupational injuries, not to mention thousands of fatalities each year, it’s a terrain that should never be taken lightly. But here’s the good news: these incidents aren’t inevitable.
Our “Fall Protection in Industrial and Construction Environments” training suite is designed to arm employees with the knowledge they need to stay safe. These comprehensive training products discuss the various fall hazards that employees can encounter in their daily work environment and provide valuable strategies on how to avoid them.
The training suite is available in a range of formats to suit your needs. Whether you prefer the punchy, focused insights of our new “Micro-Learning” modules, the in-depth exploration of our full-length online courses, or the tangible convenience of our DVDs and interactive CD courses, we’ve got you covered. Each product tackles key topics integral to an employee’s understanding of fall protection.
Course topics include:
- Preventing slips, trips, and falls
- Navigating edges, openings, and the use of “guarding”
- Safe practices for using portable and fixed ladders
- How to work safely on scaffolding
- The ins and outs of personal fall protection
- And much more!
All “Fall Protection in Industrial and Construction Environments” products are available in both English and Spanish to accommodate a diverse workforce.
For a detailed outline of our comprehensive courses, check out the “Fall Protection in Industrial and Construction Environments” course outline in PDF format.
Our bite-sized “Micro-Learning” curriculum includes the following 3-5 minute modules:
- “Preventing Slips, Trips, and Falls”
- “Edges, Openings, and Guarding”
- “Using Portable and Fixed Ladders”
- “Working Safely on Scaffolding”
- “Personal Fall Protection”
In the end, no matter where you are, safety is always a step in the right direction. So why not take that step today with our comprehensive “Fall Protection in Industrial and Construction Environments” training suite? Well, Click on the link below to learn more and to view the free demonstration of the course.
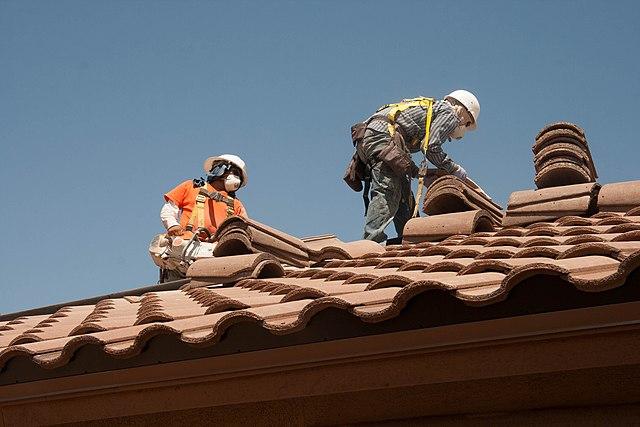
Using a Personal Fall Arrest System (PFAS)
If your crew’s working with the risk of dropping 6 feet or more, it’s on you to ensure their safety. One tool you’ve got in your kit is the Personal Fall Arrest System, known by its friends as PFAS. These life-savers, when harnessed correctly, can snatch a worker mid-fall, avoiding any unwanted introductions between them and the ground below. The PFAS comes with an anchor, a harness, and a lifeline or lanyard, often paired with a deceleration device for good measure.
Now, a PFAS ain’t worth a hill of beans if it isn’t used right. Make sure that harness is snug like a well-fitted glove. The D-ring on the harness? It should be sitting cozy between the shoulder blades, and those leg straps should be tightened until they’re comfortably secure.
You gotta ensure that the fall arrest system is designed and rigged up to prevent any worker from free-falling more than 6 feet or meeting the ground below (that’s right out of 29 CFR 1926.502(d)(16)(iii)). And don’t think about using body belts in a PFAS, they can cause real harm in a fall (29 CFR 1926.502(d)).
The anchor point for a fall arrest system must be robust enough to support 5,000 pounds per attached worker, or be designed, installed, and used under a qualified professional’s watchful eye, all while maintaining a safety factor of at least two (29 CFR 1926.502(d)(15)). Now, when you’re working on a roof, don’t go attaching anchors to sheathing, single trusses, or most guardrails. They aren’t usually up to snuff for OSHA’s standards. Instead, secure the anchor to a structural member by driving fasteners through the sheathing and right into the sturdy rafter or truss member beneath.
Remember, it’s crucial to follow the manufacturer’s instructions when setting up that anchorage. And after a fall, all equipment should be benched until a competent pro can give it a once-over to ensure it’s unharmed and ready to be put back into service (29 CFR 1926.502(d)(19)).
How to Set Up a Personal Fall Arrest System
The selection of lanyard length, anchor position, and the spacing to the floor below are all vital. You’re going to want gear that allows your crew to work smoothly while restricting how far they could plunge.
Proper assessment of the fall clearance distance is needed to ensure a tumble won’t result in a rough meeting with the ground below (29 CFR 1926.502(d)(16)(iii)). Additionally, you’ll want to consider the potential of a pendulum swing, a mishap that could thrust a fallen worker into a nearby structure. Such swing-fall hazards can lead to some severe injuries, but you can cut them down to size by positioning the anchor point up the roof slope from the worker and marking a maximum work boundary from this anchor, following the manufacturer’s guide.
A personal fall arrest system is engineered to halt a fall safely before a worker greets the lower level. It’s made up of three core elements:
- An anchor to which the lanyard’s snap hook is fastened.
- A full-body harness donned by the worker.
- A connecting piece, like a lanyard or lifeline, tying the harness to the anchor.
Personal fall arrest systems usually rely on a shock-absorbing lanyard, a self-retracting lifeline, or a deceleration mechanism.
The total fall distance is the bare minimum vertical gap between the worker and a lower level required to ensure a tumble doesn’t end in contact with the lower level. It’s crucial that you figure out this distance before any work kicks off to guarantee the right fall protection gear is chosen for the site. To pin down the total fall distance, consider a few key factors:
- Free fall distance: This is the span the worker drops before the PFAS starts to put the brakes on the fall. This distance needs to stay at 6 feet or less for a PFAS (29 CFR 1926.502(d)(16)(iii)).
- Deceleration distance: First up, you’ve got your Deceleration Distance. That’s the stretch in your lanyard when it’s doing its job, stopping your fall. Uncle Sam, also known as OSHA, likes to keep things on the safe side and says it better be no more than 3.5 feet (refer to 29 CFR 1926.502(d)(16)(iv) if you need the legal lingo). But remember, some of your gear might have you stoppin’ in even less.
- D-ring shift: Then we have the D-ring Shift. Imagine jumping off a swing and feeling your suspenders snap back – that’s your harness pulling you up. Now add the weight of your tool belt, the sandwich in your lunchbox, and the lucky charm in your pocket. Employers usually chalk it up to about a foot, but like a good suspense movie, it can vary.
- Back D-ring height: Now, we need to look at the Back D-ring height. Imagine a yardstick running from the sole of your boot to the D-ring on your harness. Now if you’re a tall drink of water, like around 6 feet, that’s typically about 5 feet. But if you’re looking up at most folks, or you’re the type they call “big and tall,” you’re going to need some adjustments.
- Safety margin: And last, but definitely not least, we got the Safety Margin. It’s a nice cozy buffer, usually about 2 feet, that ensures even if everything else goes south, you’re not going to have an unfortunate rendezvous with the ground below.
Adding all this up, you get your total fall clearance distance – the number you want to keep in mind if you fancy staying in one piece while working up high.
Rescue of Workers
Whenever personal fall arrest systems are in play, bosses need a strategy on deck for pulling their crew out of a pickle in the case of a tumble. A personal fall arrest system can certainly be a lifesaver, but it’s not the end-all solution. If a worker isn’t plucked from danger promptly, a medical crisis, like suspension trauma, can rear its ugly head. A worker who’s taken a spill might not be able to claw their way back to a safe work perch solo.
You’re going to want to size up your options for rescue personnel, ladders, or other lifesaving gear before work kicks off. Bosses need to be sure supervisors and workers are schooled in the fine art of guiding a fallen worker back to safety. Rescues need to be swift (29 CFR 1926.502(d)(20)) and safe, to dodge any extra injuries.
Using a Fall Restraint System
Bosses have the option to put a fall restraint system to work as a means of safeguarding their crew from fall risks. A fall restraint system acts as a barricade to keep workers from skidding off the edge of the walking/working zone, even if they hit a slick patch and lose their balance. OSHA suggests these systems should pack a punch, able to take on a 3,000-pound load or twice the top estimated force needed to keep the employee clear of the fall danger zone.
For more info, check out:
Letter/Interpretation: Fall restraint system used in lieu of fall arrest systems.
When supervisors set up fall restraint systems to keep workers clear of unprotected edges, they need to make sure their crew knows how to work out the right lanyard length before starting the job. It’s all part of keeping everyone safe and steady.
Using a Guardrail System
Companies have the ability to put guardrail systems into practice around rooftop openings and along the roof’s edge to safeguard their crew from risks associated with falls. The marketplace is teeming with temporary guardrail setups that fasten to rafters or other structural elements.
The top rails of a guardrail system need to be set anywhere from 39 to 45 inches above the surface where workers tread (29 CFR 1926.502(b)(1)). If there’s no wall or parapet wall standing at least 21 inches tall, you’re going to need some intermediate structural elements in place – things like midrails or screens (29 CFR 1926.502(b)(2)). Should midrails be part of the plan, they’ve got to be positioned smack in the middle, splitting the distance between the top edge of the guardrail setup and the walking/working surface (29 CFR 1926.502(b)(2)(i)).
A guardrail system has to be tough enough to take a 200-pound punch, whether that force comes outward or downward, and it’s got to take it within 2 inches of the top edge (29 CFR 1926.502(b)(3)). Midrails, screens, mesh, intermediate vertical components, solid panels, and similar structural elements need to be able to resist a 150-pound force, whether it’s coming from an outward or downward direction (29 CFR 1926.502(b)(5)).
Guardrail systems must be finished in such a way that they’re smooth to the touch, which is designed to ward off punctures and cuts, and also to make sure clothes don’t get caught and cause a whole different kind of safety hazard (29 CFR 1926.502(b)(6)).
Warning Lines and Safety Monitors
Businesses have a handful of options when it comes to safeguarding their crew members from potential falls while they’re busy with roofing tasks on low-slope roofs. They might opt for a combination of caution line system and guardrail setup, or perhaps a caution line system partnered with a safety net setup. Maybe a caution line system together with a personal fall arrest system, or a caution line system alongside a safety monitoring system could be the way to go. Or, if we’re talking about roofs that are 50 feet or less in width (that’s around 15.25 meters for the metric-minded), the employment of a lone safety monitor is allowed (29 CFR 1926.501(b)(10)). Let’s be clear, though, this safety monitor is always, without exception, a competent individual (29 CFR 1926.500(b)).
A caution line system calls for ropes, wires, or chains, and their supporting pillars (29 CFR 1926.502(f)(2)). Here’s what that caution line system needs to feature:
- It’s got to be set up at a minimum of 6 feet (1.8 meters) from the roof’s edge (29 CFR 1926.502(f)(1)(i)); when mechanical equipment’s in use, make that a minimum of 10 feet (29 CFR 1926.502(f)(1)(ii)).
- It needs to be flagged every 6 feet or so with material that’s easily visible (29 CFR 1926.502(f)(2)(i)).
- The system has to stand no less than 34 inches (that’s around .9 meters) and no more than 39 inches (about 1.0 meter) from the surface where folks are walking or working (29 CFR 1926.502(f)(2)(ii)).
- The system must be able to stand up to a force of at least 16 pounds (71 Newtons) without toppling over (29 CFR 1926.502(f)(2)(iii)).
- The system’s gotta have a minimum tensile strength of 500 pounds (that’s 2.22 kilonewtons) (29 CFR 1926.502(f)(2)(iv)).
- The system has to be secured in such a way that yanking on the line won’t result in any slack being pulled from adjacent sections before the pillar falls over (29 CFR 1926.502(f)(2)(v)).
Companies have the option to use covers as a method of preventing workers from an unwanted tumble through skylights and other openings on the roof (29 CFR 1926.501(b)(4)(i)). If covers are your go-to strategy, here’s the deal:
- These covers need to be sturdy enough to support, without giving way, at least twice the weight of your team members, equipment, and materials that might be put on them at any one time (29 CFR 1926.502(i)(2)).
- When installed, it’s crucial to ensure these covers are secured firmly to prevent accidental displacement by elements such as wind, equipment, or even your own employees (29 CFR 1926.502(i)(3)).
- Lastly, these covers should be color-coded or marked with either “HOLE” or “COVER” to provide a clear warning of the lurking hazard (29 CFR 1926.502(i)(4)).
All Ladders
Ladders are the workhorses of the roofing business, providing roofers a steady climb to their high-altitude worksites. Extension ladders and stepladders are the big players in this game.
It’s on you as the employer to make sure these ladders are checked out regularly by a knowledgeable person for any visible flaws, and definitely after any incidents that might impact their safety (29 CFR 1926.1053(b)(15)).
It’s also your job to educate every worker about recognizing ladder-related dangers and the best ways to dodge these hazards (29 CFR 1926.1060(a)).
Now, footing is paramount when dealing with ladders; they should only be used on stable, flat surfaces, unless they’re anchored to keep them from tipping (29 CFR 1926.1053(b)(6)). Sometimes you might need to take extra steps to ensure a secure, supportive footing that prevents the ladder from sinking, shifting, or sliding.
Make sure the top and bottom areas of the ladder are clutter-free (29 CFR 1926.1053(b)(9)). And never place ladders in high-traffic areas, such as driveways or doorways, unless they’re secure or shielded from the traffic by a barricade (29 CFR 1926.1053(b)(8)).
Worker Position on a Ladder
Think of it like a juggling act, you want your workers to always have three points of contact—either two hands and a foot, or two feet and a hand—when they’re going up or down a ladder. And let’s make sure they’re not hauling anything that could cause them to topple over (29 CFR 1926.1053(b)(22)). (A simple trick is to stash tools in a bucket and use a rope to haul them up to the work zone.)
Extension Ladders
It’s up to you to make sure that non-self-supporting ladders are angled correctly. The horizontal gap between the top support and the ladder’s base should be roughly a quarter of the ladder’s working length (a 1:4 ratio) (29 CFR 1926.1053(b)(5)(i)). (By “working length,” we mean the distance along the ladder from the base to the top support.) Generally, the ladder’s side rails should extend at least 3 feet past the upper landing surface your worker’s trying to reach (29 CFR 1926.1053(b)(1)). If you can’t manage this extension due to the ladder’s length, you’ve got to secure the top of the ladder to a sturdy, non-flexible support, and offer a grabbing device like a grabrail to help workers get on and off the ladder.
Stepladders
Just as a reminder, make sure your crew uses stepladders in the fully open position. No one should be using the top or the top step of a stepladder as a step, because that’s just asking for trouble (29 CFR 1926.1053(b)(13)).
To keep things safe on the ladders, take a look at these additional resources:
- Falling Off Ladders Can Kill – Use Them Safely: www.osha.gov/Publications/OSHA3625.pdf
- Safe Use of Extension Ladders – Fact Sheet: www.osha.gov/Publications/OSHA3660.pdf
- Safe Use of Job-made Wooden Ladders – Fact Sheet: www.osha.gov/Publications/OSHA3661.pdf
- Safe Use of Stepladders – Fact Sheet: www.osha.gov/Publications/OSHA3662.pdf
- NIOSH Ladder safety app for mobile devices: www.cdc.gov/niosh/topics/falls
And for an even deeper dive, check out the OSHA requirements on ladders in 29 CFR 1926.1053.
Scaffolding
Remember, scaffolds must be designed by someone who knows what they’re doing, and they should be built and loaded following that design (29 CFR 1926.451(a)(6)). You need to make sure that the people setting up, moving, dismantling, or changing scaffolds are experienced and trained. This work should be done under the watchful eye of a competent person who knows their stuff about scaffold erection, moving, dismantling, or alteration (29 CFR 1926.451(f)(7)).
Access
One of the riskiest moments for a worker on a scaffold is when they’re getting on or off of it. That’s why it’s crucial to provide safe scaffold access. If scaffold platforms are more than 2 feet above or below an access point, workers need to use portable ladders, hook-on ladders, attachable ladders, stair towers, stairway-type ladders, ramps, walkways, integral pre-made scaffold access, or direct access from another scaffold, structure, personnel hoist or similar surface (29 CFR 1926.451(e)(1)).
Platform
You need to make sure that every platform on all working levels of scaffolds is fully planked or decked between the front uprights and the guardrail supports, as described in 29 CFR 1926.451(b)(1). The space between adjacent platform units and the space between the platform and the uprights shouldn’t be more than 1 inch (2.5 cm) wide, unless you can show that a wider space is necessary (29 CFR 1926.451(b)(1)(i)).
Guardrails
When your workers are on a scaffold that’s more than 10 feet above a lower level, you need to protect them from falls (29 CFR 1926.451(g)(1)). A lot of the time, employers use guardrails to do this.
To meet OSHA’s fall protection requirements for scaffolds, you need to install guardrails along all open sides and ends of platforms (29 CFR 1926.451(g)(4)(i)). Usually, toprails should be installed between 36 or 38 and 45 inches above the platform surface, depending on the type and age of the scaffold (29 CFR 1926.451(g)(4)(ii)). Toprails need to be able to withstand, without breaking, a force (applied in any downward or horizontal direction at any point along its top edge) of at least 100 pounds for single-point and two-point adjustable suspension scaffolds and of at least 200 pounds for all other scaffolds (29 CFR 1926.451(g)(4)(vii)).
If you’re using midrails, you need to make sure that they’re installed at a height about midway between the top edge of the guardrail system and the platform surface (29 CFR 1926.451(g)(4)(iv)).
If you’re using screens and mesh, they need to extend from the top edge of the guardrail system to the scaffold platform, and along the entire opening between the supports (29 CFR 1926.451(g)(4)(v)).
The midrails, screens, mesh, intermediate vertical members, solid panels, and equivalent structural members of a guardrail system need to be able to withstand, without breaking, a force applied in any downward or horizontal direction at any point along the midrail or other member of at least 75 pounds for guardrail systems with a minimum 100 pound toprail capacity, and at least 150 pounds for guardrail systems with a minimum 200 pound toprail capacity (29 CFR 1926.451(g)(4)(ix)).
Falling Object Protection
As an employer, you must safeguard your workers from objects that could fall from scaffolds (29 CFR 1926.451(h)(1)). If there’s a risk that tools, materials, or equipment could fall from a scaffold and hit workers below, there are a series of requirements you need to follow (29 CFR 1926.451(h)(2)). You need to barricade the area below the scaffold, and workers shouldn’t enter this hazardous area (29 CFR 1926.451(h)(2)(i)).
In general, you also need to erect toeboards along the edge of platforms that are more than 10 feet above lower levels, for a distance enough to protect workers below (29 CFR 1926.451(h)(2)(ii)). When you use toeboards, they must be at least 3½ inches high from the top edge of the toeboard to the level of the walking/working surface. They must also be securely fastened at the outermost edge of the platform and have no more than 1/4 inch clearance above the walking/working surface (29 CFR 1926.451(h)(4)(ii)).
Training for Scaffolding
Employers are required to appoint a qualified person to instruct workers on how to identify and manage hazards associated with the specific type of scaffold in use (29 CFR 1926.454(a)). Furthermore, employers must designate a competent individual to train workers who assemble, disassemble, relocate, repair, maintain, operate, or inspect scaffolds. This training should equip workers to recognize any potential hazards associated with these activities on the scaffold systems they will be using (29 CFR 1926.454(b)). Importantly, this training should be provided in a language that the workers can understand.
Employers are obligated to provide refresher training to workers in the following instances:
- When changes at the worksite introduce new hazards,
- When alterations in the type of scaffold, fall protection systems, falling object protection systems, or other equipment introduce new hazards,
- When deficiencies in work involving scaffolds suggest that the worker has not maintained the necessary proficiency.
For further details on what should be incorporated in scaffold training, please refer to 29 CFR 1926.454 – Training Requirements.
Now that we’ve highlighted the importance of adequate scaffold training, we’re excited to offer an excellent resource that aligns perfectly with the needs of the construction industry. It’s clear that informed and trained workers are the backbone of a safe and productive work environment. That’s why we are delighted to introduce our training packages.
Working off the ground on scaffolding can increase productivity and provide better access to work surfaces. But with this increased efficiency comes an increased risk. Supported scaffolding hazards account for thousands of injuries and over 50 fatalities each year. To ensure your employees’ safety and compliance with OSHA regulations, we are proud to introduce two robust and comprehensive training packages: “Supported Scaffolding Safety in Industrial and Construction Environments” and “Suspended Scaffolding Safety in Construction Environments.”
Both training programs offer employees a deep understanding of scaffold work, the associated risks, the correct safety measures, and relevant OSHA regulations. The training courses cover essential topics such as building a secure platform, safely accessing scaffolds, fall protection, the dangers of power lines, personal fall arrest systems, and guarding against falling objects.
Our “Supported Scaffolding Safety in Industrial and Construction Environments” training includes micro-learning and full-length online courses, DVDs, and interactive CD courses. The curriculum includes topics like “Supported Scaffolds and OSHA Regulations,” “Building a Firm Foundation,” “Assembling a Secure Platform,” “Accessing a Scaffold Safely,” and “Fall Protection.”
Similarly, our “Suspended Scaffolding Safety in Construction Environments” training features in-depth courses like “About Suspended Scaffolds,” “Suspension Devices,” “Ropes,” “Platforms,” “Safe Work Practices,” and “Fall Protection.”
These courses are not only designed to enhance understanding but also to ensure employers meet OSHA’s Scaffolding regulation training requirements. The flexibility of our formats, from micro-learning to full-length courses, allows for a tailored training approach to meet your specific needs.
Both these training products are available in English and Spanish, broadening the scope of learning for a diverse workforce.
By investing in our scaffold safety training courses, you are ensuring your employees have the knowledge and skills to work safely on and around scaffolds, reducing the risk of accidents and contributing to a safer, more productive working environment. Secure your team’s safety today with our comprehensive scaffolding safety training packages.
Aerial Lifts
These remarkable machines take our hard-working folks up to the roof’s edge. But they aren’t a carnival ride, no sir. Only those with the right training and the green light from the bosses are allowed to take the controls of these extensible and articulating boom platforms (29 CFR 1926.453(b)(2)(ii)). And every day, before the work begins, we need to test those controls. We’re talking a daily check-up to make sure everything’s ship-shape (29 CFR 1926.453(b)(2)(i)).
Now, when it comes to these boom platforms, we’ve got a couple of ground rules to ensure everyone goes home safely. One, you stand sturdy on the basket floor – no sitting on the edge, no climbing, and certainly no makeshift contraptions like planks or ladders to gain some extra height (29 CFR 1926.453(b)(2)(iv)).
And two, you’re always tethered to the boom or basket (29 CFR 1926.453(b)(2)(v)). Think of it as your lifeline, it’s there for a good reason.
But remember, these are just some of the guidelines. OSHA has a whole handbook full of requirements for aerial lifts in 29 CFR 1926.453. Take a gander at it and keep our sky-high workers safe and secure.
All-Terrain Forklifts
Now, let’s talk about all-terrain forklifts. They fall under the purview of 29 CFR 1926.602(c) – some kind of fancy regulatory language, but all it means is they’ve got their own rules to follow. We use these rugged machines to lift equipment and materials up to the roof. Sometimes, with the right setup – we’re talking manufacturer-approved man-baskets – we even use them to give our workers a lift (29 CFR 1926.602(c)(1)(ii)).
But hold on a minute, when we’re hoisting workers, it’s not a cowboy operation. A safety platform, firm as the earth beneath our boots, must be locked down tight to the lifting carriage or forks (29 CFR 1926.602(c)(1)(viii)(A)).
And we’re not just letting any Joe Shmoe behind the wheel. Forklift operators need to know their stuff, inside and out (29 CFR 1926.602(d); 29 CFR 1910.178(l)). They need to be trained, and not just any training, but the right kind of training that keeps everyone safe.
Safe Debris Disposal
Let’s shift gears to debris disposal – something a lot of folks don’t think about, but safety’s in the details, folks. When we’re talking about handling debris, we’re not just talking about cleaning up, we’re talking about keeping workers safe. Mismanaged debris? That’s a trip hazard, it contributes to falls, and, worse still, it can drop like a rock on folks below. Not on my watch!
Now, here’s an idea that’s as practical as duct tape – using a forklift to raise a collection box up to roof level. Fill ‘er up and lower it down when you’re done. It’s like a trash elevator, saving steps and backs. Plus, it makes the cleanup process smoother than a well-oiled engine.
Electrical Safety
Let’s get serious for a moment though. We need to talk about electrical safety. Now, most times a roofer gets electrocuted, it’s because they came into contact with overhead powerlines. But it’s not just the lines in the sky – workers can get a nasty surprise from electrical conduit buried in old roofing material, too.
The solution? Employers need to have their workers’ backs, making sure they’re safe from electrical hazards by turning off circuits, grounding, or insulating effectively (29 CFR 1926.416(a)(1)). But don’t just take my word for it, check out more on electrical safety under 29 CFR 1926, Subpart K.
Integrity of Older Buildings
Hold your hammers, folks. Before you even think about climbing up there, you’ve got to know what you’re dealing with. Now, I’ve been around the block, and let me tell you, some roofs have seen better days. Employers, you’ve got a job to do before your workers pull out the first nail – making sure that roof has the muscle to hold up your crew (29 CFR 1926.501(a)(2)).
Sure, it’s got charm, maybe even some of that vintage appeal, but if it’s older than dirt, it might need a check-up before you step foot on it. Sometimes, you might even have to play detective, inspecting the roof from the inside to spot any potential troublemakers. So, remember, folks, safety first, and that starts from the ground up – or in this case, from the inside out.
Roofing Operations/Built-up Roofing
Now, let’s talk about built-up roofing. You might not see it often on residential jobs, but when it comes to commercial work, it’s a whole different ball game. And this isn’t your average nail and hammer gig – we’re dealing with hot tar here, folks. We’re talking about temperatures up to 500°F, and let me tell you, if that stuff gets out of hand, you’re in for a world of hurt.
But it’s not just about the burns, mind you. Add fire into the mix and you’ve got yourself a kettle that could turn into a fireworks show, and not the kind you want to watch. So let’s make sure we’re ahead of the game here – a fire protection program is a must-have on any site dealing with this stuff (29 CFR 1926.150(a)(1)).
Think about it, you’re working with more than 5 gallons of flammable liquid, or maybe 5 pounds of flammable gas. You need to have a fire extinguisher ready and waiting, and not just any extinguisher, but one rated not less than 10B, and it should be within a 50-feet striking distance (29 CFR 1926.150(c)(1)(vi)).
And remember, every bit of equipment you’re working with has got instructions and precautions from the folks who made them – they’re there for a reason, folks, so make sure you’re taking note. And that includes training your workers on the safe use of all this equipment (29 CFR 1926.20(b)(4) and 29 CFR 1926.21(b)(2)).
Finally, don’t forget about the gear. Working with hot tar is a messy business – spills, splashes, you name it. So make sure your workers have the right stuff: gloves, boots, long sleeve cotton shirts, long cotton pants without cuffs, and eye protection or face shields. Safety doesn’t take a day off, folks, and that’s doubly true when you’re working with hot tar.
Torch Applied Roofing
Now let’s move onto torch applied roofing, folks. Imagine working with an open flame system that can reach temperatures up to a whopping 2,000°F. And this isn’t your backyard grill, this is serious business. An improper application can conduct heat to ignite combustible materials like wood decking or trusses, often without you even realizing it.
The best way to prevent any catastrophic mishaps is through preconstruction surveys, adhering to ply manufacturer’s application techniques, and maintaining a vigilant fire watch. A regular fire-watch inspection by someone who knows what they’re doing should be done throughout the day, and for at least two hours after the last torch is snuffed out on the roof. And they should have a keen eye on the roof’s entire field, flashings, and even the underside of the roof deck.
Now, here’s another thing – propane tanks. Let’s just say they’re not your friend if you’re not careful. A heated tank with a torch, or a tank on its side, or using the wrong gauge or pressure – these are just a few recipes for disaster. Employers need to make sure that propane tank storage is up to snuff, following local building codes and the OSHA requirements at 29 CFR 1926.153(j), 29 CFR 1926.153(k) and 29 CFR 1926.153(l).
Single-ply Roofing
Let’s talk single-ply roofing for a moment. Some of these jobs involve hot work, but many times, you’ll be dealing with solvent-based adhesives. Now, these adhesives, as harmless as they might seem, they’re actually highly flammable. So, employers, this one’s for you – make sure your folks know that open flames and cigarettes have no business being around when these adhesives are in use.
And that’s not all. It’s also vital that workers understand what those warning labels on the adhesive containers are telling them. You know those safety data sheets (SDSs) that come with the adhesives? They’re not just for show. They’ve got important information on them about personal protective equipment (PPE) handling and use recommendations. So, make sure you’re up to speed on those, and make sure your workers are too.
Roofing Tool Safety
Alright, let’s have a chat about roofing tool safety. Now, it’s no secret that hand and power tools used in roofing can be dangerous and can result in some serious injuries if not handled properly. As employers, you have a responsibility to mitigate these risks. Providing tool guards, the right PPE, and crucial training to your workers can make all the difference.
Consider your power tools, like nail guns and saws. They ought to have the right shields, guards, or safety attachments, just as the manufacturer recommends. Eye protection isn’t an option; it’s a requirement when using power tools, and employers, it’s your job to make sure that’s happening (29 CFR 1926.102(a)(1)). And don’t let damaged or missing tool guards slide; replace ’em immediately (29 CFR 1926.300(b)(1)).
Training is another big part of this equation. Teach your workers how to use these tools and equipment properly. Include everything from safety features of tools, the right operating procedures, safe work practices, such as the right way to position themselves while working, and how to make the most of their PPE. Remember, a well-trained worker is a safe worker.
Personal Protective Equipment
Alright, let’s talk a little bit about Personal Protective Equipment, or as we like to call it, PPE. As employers, you’ve got a responsibility to protect your folks from any known hazards. Now, if you can’t eliminate those hazards with other types of controls, like engineering or administrative, well, it’s time to bring in the PPE (29 CFR 1926.28 and 29 CFR 1926.95). It’s on you to make sure your workers know the ins and outs of their PPE, like how to inspect it, take care of it, make sure it fits right and how to use it.
Now, let’s talk about typical PPE with various roofing tools and equipment.
- Take nail guns: Make sure your folks are wearing hearing and eye protection, and using safety devices that won’t let the gun discharge unless it’s in contact with the work surface. Remind them not to carry the nail gun against their body, finger on the trigger, or while hooked up to the air compressor. For more information see: https://www.osha.gov/doc/topics/nailgun/index.html
- Now, when working with a generator or an air compressor, it’s hearing and eye protection again.
- Using compressed air? Same thing, but also use a whip check or wire connections to prevent separation. Make sure that pressure is adjusted right for the tool.
- Shingle stripper, on the other hand, requires proper footwear and eye protection.
- For tin snips, you’ll need work gloves and safety glasses. And don’t forget to discard waste or scrap metal appropriately.
- Power saws need hearing and eye protection, and work gloves. Make sure those blades are sharp and that the guards are in place and working correctly.
- When working near mobile equipment or traffic, high-visibility clothing, like a vest, is a must.
- Working over 6 feet up with no protection? Time to bring in the fall arrest or fall restraint equipment.
- And if there are hazardous substances around? You’ll need an appropriate respirator if permissible dust, mist, or fume levels are exceeded.
Now, in general, you need to figure out when it’s right for your workers to wear hard hats, safety glasses, and work boots. Make sure they know how to inspect their PPE and wear it in a way that will protect them from the hazards they might run into on the work site. And remember, workers required to wear respirators must be covered by a respiratory protection program and meet other requirements of 29 CFR 1926.103 and 29 CFR 1910.134 – Respiratory Protection.
Hazard Communication
Now, we need to talk about Hazard Communication. If your crew is around hazardous substances, you’ve got to have a program that trains them on how to interpret safety data sheets, container labels, and other warnings. The training also has to cover protective measures your workers should take. Now, you don’t keep this information to yourself – it’s vital you share it with other employers on the site who might also be exposed. Remember, this isn’t just good practice; it’s laid out in regulations 29 CFR 1926.59 and 29 CFR 1910.1200.
Specific Health Hazards
Roofers, here are some health hazards that you may face up there:
- First off, Asbestos. Mainly it enters the body through inhalation, and it can also get in if you eat or smoke in a contaminated area. Breathing in asbestos fibers can cause a scar-like tissue buildup in the lungs, leading to conditions like “asbestosis”, loss of lung function, and even death. Asbestos is also a known cause of lung cancer. You might find asbestos in insulation products and roofing materials, especially on older homes. If you’re dealing with asbestos-containing materials, make sure to follow the protection requirements as per 29 CFR 1926.1101 – Asbestos.
- Lead is another culprit. It enters your body primarily through inhalation and ingestion. You’re most likely to inhale lead-containing dust and fumes, which can harm multiple body organs. Lead is often found in lead-based paints, including the old paint on exposed woodwork and steel. For the necessary protection while dealing with lead, check out 29 CFR 1926.62 – Lead.
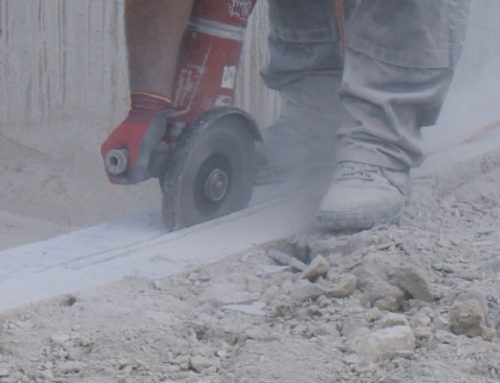
- Silica is up next. Tiny crystalline silica particles can cause silicosis if inhaled. The symptoms might include shortness of breath, cough, and fatigue, which may or may not be obviously linked to silica. Long-term exposure also increases the risk of lung cancer, chronic obstructive pulmonary disease, and kidney disease. Silica might be found in concrete and ceramic roof tiles. For protection requirements while working with silica, see 29 CFR 1926.55 – Appendix A, Gases, Vapors, Fumes, Dusts, and Mists.
- And lastly, there are other hazards you should be aware of. For further details, consult 29 CFR 1926.55 – Appendix A, Gases, Vapors, Fumes, Dusts, and Mists.
Coordinating with Other Contractors
It’s essential that every contractor on the job site is in the loop about all ongoing operations. For instance, folks should be aware of barricaded areas set up by other employers to lower the chances of being hit by falling debris or moving equipment. It’s all about playing it safe!
Housekeeping
Now, let’s talk about housekeeping. Good housekeeping helps keep the worksite tidy and reduces hazards that could cause someone to trip or take a tumble. Look out for loose cords and air hoses that might roll underfoot and knock you off balance on a roof. Secure your supplies and hand tools to avoid any tripping risks. And when you’re not using your tools, secure them to ensure they won’t go on a free fall off the roof. And for the legal part, refer to 29 CFR 1926.25. Let’s keep it clean and safe, folks!
Emergency Action Plan (EAP)
Now, onto the Emergency Action Plan (EAP). You need to know what to do when things take a wrong turn. Bosses are obliged to get you up to speed on any EAP required by the powers that be at OSHA – that’s in line with 29 CFR 1926.35(e)(2). EAPs need to cover stuff like the best way to report emergencies and the protocol for high-tailing it out of the area safely – check out 29 CFR 1926.35(b) for more.
Now, here’s a practical tip – always be aware of the street address of your worksite, just in case you need to guide the cavalry to your location in a hurry. Go ahead and post the street address of your site and the emergency contact info in spots where everyone can see them. This way, if an emergency strikes, you won’t be left scratching your head, and you can get the pros on the scene pronto.
First Aid and Medical Emergencies
Here’s something you might not think about until it’s too late: First Aid and Medical Emergencies. Let’s say there’s no hospital, clinic, or doc in a white coat anywhere nearby – that’s when the person in charge needs to make sure there’s someone on site who’s got first aid training, and they better have some solid proof to back it up, like a certification (see the rulebook at 29 CFR 1926.50(c)). And when it comes to first aid supplies, they need to be handy when you need them – that’s straight from 29 CFR 1926.50(d)(1).
Now, here’s something else to remember: if there’s any chance your eyes or skin could come into contact with corrosive stuff that could hurt you, there need to be facilities on site for quick drenching or rinsing of your eyes and body. We’re talking about an immediate solution to a sudden problem (29 CFR 1926.50(g)). For more on this, you’ll want to read up on 29 CFR 1926.50 – Medical Services and First Aid.
General Duty to Protect Workers from Other Hazards
Now, think about this: as roofers, you’re up there in the thick of things, come rain or shine, heat or chill, exposed to the elements and at the mercy of whatever’s buzzing or biting up there. Now, it’s the boss’s job to shield you from these serious threats on the job – it’s not just a nice thing to do, it’s the law. We’re talking about Section 5(a)(1) of the Occupational Safety and Health Act.
Heat Illnesses
Let’s face it, every year countless folks get knocked off their feet due to heat exposure while on the job. The gut-wrenching part? These incidents, including the heartbreaking fatalities, are preventable.
So, what’s the enemy looking like? Keep an eye out for:
- Hammering headaches
- Feelings of dizziness and light-headedness
- An alarming absence of sweat despite the sweltering heat
- Skin that’s red, hot, and dry
- Muscles going weak or cramping up
- Nausea hitching a ride with vomiting
- Heartbeat racing, could be robust or feeble
- Breathing that’s rapid and shallow
- Changes in behavior – think confusion, disorientation, or staggering
- Seizures
- And the big one, losing consciousness
It’s up to the folks in charge to put a strategy in place to ward off these heat-related nasties. We’re talking a spectrum of illnesses here, from a pesky heat rash and heat cramps right up to heat exhaustion and the big one – heat stroke. If heat stroke rears its ugly head, it’s an all-hands-on-deck medical emergency – this one can be fatal.
Those calling the shots should be looking after their crew with ample water, rest, and shade. And don’t forget – easing in new workers or those returning from a week or more off with gradually increased workloads and extra breaks. Let’s educate everyone about the signs of heat-related illnesses and how to stop them in their tracks.
The mantra? WATER, REST, SHADE. Repeat it, remember it, and most importantly, put it into action.
For more in-depth info on warding off these heat beasts, as well as resources for planning and training, check out OSHA’s Heat Illness Prevention website over at www.osha.gov/heat. It’s got your back.
Cold Stress
Let’s not forget the flip side of the weather coin – the cold. Staying out in freezing or downright cold temperatures for too long can open up a Pandora’s box of serious health issues. We’re talking about trench foot, frostbite, and hypothermia. In the most severe cases, like getting dunked in icy waters, the stakes could be as high as life itself.
The folks in charge need to make sure their teams know what the warning signals of cold stress look like. Keep an eye out for uncontrollable shivering, mumbled speech, clumsy movements, feeling wiped out, and confused behavior. If any of these signs crop up, workers need to know how to call in the cavalry for emergency help.
For more know-how on keeping cold weather injuries, illnesses and even fatalities at bay, as well as resources for planning and training, take a trip to OSHA’s Winter Weather website: https://www.osha.gov/winter-weather. It’s got all the intel you’ll need.
Other Weather Conditions
Let’s not overlook the other wildcards mother nature might deal – high winds, rainy weather, and icy conditions. These are particular headaches for our brave roofers. For the folks running the show, it’s crucial to think about hitting the pause button when the weather turns nasty. This goes double when the team is dealing with roofing surfaces that turn into slip-n-slides when wet, like slate, tile, metal roofs, or some single ply membranes.
Conclusion
The work of a roofer is no small task – it’s strenuous, often precarious, and ever-dependent on the whims of Mother Nature. Safety in this line of work is not just a checkbox; it’s a daily commitment, a mindset, a culture that underpins everything you do up on those rooftops.
At the heart of it all is the trifecta of planning, providing, and training. It’s about foreseeing the risks, equipping our folks with the right gear and tools, and ensuring they have the knowledge to handle their tasks safely and efficiently.
From navigating the dizzying heights with the help of Personal Fall Arrest Systems to understanding the right way to climb those rungs, we’ve covered the absolute essentials of fall protection. And, it’s not just about prevention; we’ve also discussed the importance of having a robust rescue plan.
We’ve delved into the specifics of different roofing operations and the unique safety measures each one requires. We’ve talked about the right way to handle nail guns and the necessary precautions to take when working with hazardous substances. Every tool has its purpose, and every substance its precautions.
But it doesn’t stop there. We’ve highlighted the importance of constant communication – not just within your team, but with other contractors on the site. A tidy worksite is a safer worksite, and good housekeeping practices can be a game-changer.
Emergencies are unpredictable, and being prepared for them is paramount. We’ve outlined the essentials of an Emergency Action Plan (EAP) and the necessity for quick access to first aid and medical help when required.
The job of a roofer is at the mercy of the elements – sweltering heat, numbing cold, and everything in between. We’ve shed light on the dangers of heat and cold stress and the importance of being prepared for other weather conditions.
In conclusion, safety in roofing isn’t a one-off task – it’s a continuous process, a collective effort, and an investment in the wellbeing of our workers. From the ladders they climb to the hats they wear, every aspect matters. Remember, a safe roofer is a successful roofer. So let’s carry these safety practices forward, not just as guidelines to follow, but as a commitment to every worker who scales those heights each day. Here’s to safer rooftops and even safer roofers.