Help

Big Red

Seasonality

J
F
M
A
M
J
J
A
S
O
N
D

Summary

Deep water, great rock and awesome lines.

Description

Local cliff jumping spot, Big Red. Main wall is 12m high with the lower wall around 5-6m high. Deep water through nearly every line.

See below for DWS safety rating.

S0 – Safe Solo. This has an area of deep water.

S1 – Pretty safe. Watch out for boulders and water depths.

S2 – Not quite safe. Recommended during high tide. Pick a landing spot carefully.

S3 – Dangerous. You will fall on shallow water which will make your fall painful.

Access issues inherited from Nowra

This climbing area has recently become a focus spot for tension between climbers and the local Aboriginal community. Be informed and respect closures. Clean up chalk and rethink adding additional new routes to crags with access issues.

Approach

Park at the end of Crams Road, North Nowra. Walk down to river and head downstream (left). Follow this track until you get to the crag.

Ethic inherited from Nowra

Mostly developed as a sport climbing and bouldering area. Some trad climbing exists, mainly the pure cracks. If developing new areas keep an eye and and ear out for Aboriginal cultural heritage, including cave art.

Tags

Routes

Add route(s) Add topo Reorder Bulk edit Convert grades
Grade Route

S1. Out of the water and dry off on the small ledge right of the small tree. Up and left into the weird scoop. Top out to left.

FA: Jack Folkes, 13 Nov 2014

S1. Just right of 'SOTD' on the steeper (just overhanging) wall.

S1. Steep bottom section to slopey top half. Underwater rock close to wall, be careful on bottom section.

S2. Steep bottom section to slopey top half. Visible underwater rocks at low tide along with the ledge to the right. Take care when attempting.

Start on the block, traversing left to the big platform and climb the corner crack to top out.

FA: Jake Noblett, 2010

From shallow ledge up pockets to triangle ledge.

FA: Steve Barker, 2010

Traverse left from triangle ledge to edge of platform then climb up one meter to the next break and traverse right for 5m and then down climb back to triangle ledge.

FA: Steve Barker, 2010

S0. Either traverse left from triangle ledge or start from left. Out through honeycomb and up left nose.

Right to left traverse from the triangle start ledge. Staying in the break as much as possible. Top out under the next roof. S0.

FA: Nick Stubbs, 2 Apr 2015

Start from water into layoff foot jam crack over bulge and into LTTW finishing at deep 2 finger pockets after last rooflet before the crux on LTTW then backflip into water from dead arm hang.

FA: Jake Noblett, 2010

S1. Start on the triangular ledge, move up and left through roof to top just right of arete/nose.

FA: Jack Folkes, 26 Mar 2016

Start from water up pockety overhang to triangle ledge.

FA: Steve Barker, 2010

Start in water on right hand face of arette after 1m climb up arette to triangle ledge.

FA: Jake, 2010

Start from bottom of cliff and climb the corner to top out. Falling is no option here.

FA: Jake Noblett, 1998

S3. Spotter 100% needed. Start on the ledge, out and up over the nose. Will definitely go, spotter needed to shove you away from the ledge if you fall. Also ledge at water level.

S0. Either out of the water or walk in on ledge (dry at lowest tide). Up the arete and over the wedged boulder.

FA: Jake Noblett & Lewyy, 2012

Follow any line of jugs on right side of main corner starting from water to top out.

FA: Jake Noblett, 1998

S0. Left to right traverse of the lower dark wall (below the rope swing). Done at both low and high tide, you shouldn't be getting wet!

FA: Steve Barker, douglas & Lewyy, 2013

S0. Start along No Heroics, after the undercut moves at the start, head straight up around the bulge with a weird mantle with monster side pull jugs.

FA: Jack Folkes, 2014

S0. Traverse in or straight out of the water. Follow the jugs straight up to the slopey ledges, involves 2 precarious mantles...

FA: Duncan Brown, 2013

S0. Start up Testicular Fortitude and after the first mantle, move right for a lip traverse with a hard sideways dyno. Top out a couple of moves later. Full high lip traverse still a project.

FA: Jack Folkes, 2014

S0. On the lower wall under the rope swing. Traverse in via No Heroics or climb straight out of the water into a sloping ramp with 2 plants. Big 6+ footdyno from the slightly positive ramp to big jugs on top of wall.

S0. On the lower wall under the rope swing. 3-4m right of previous dyno and much bigger. Another sloping ramp to an even bigger 7+ foot dyno for worse jugs.... Good luck.

S0. Eliminate using only the crack... Get your finger locks going...

S0. Link from the crack into Cave Left. Follow the crack up (not eliminate) then dyno out right, joining in to Cave Left.

FA: Steve Barker, 2010

S0. On the lower wall under the rope swing. Starting in the cave, climb out the left hand side following the cave mouth, topping out over the centre of the cave mouth. Might not be climbable at the moment as birds are nesting in the cave and every hold is covered in shit.

FA: Jake Noblett & Lewy Joseph, 2013

S0. On the lower wall under the rope swing. Starting in the cave, climb out right through some tough moves, again follow the cave mouth back left to top out the same as Cave Left. Might not be climbable at the moment as birds are nesting in the cave and every hold is covered in shit.

FA: Jake Noblett, 2012

S0. Just right of the cave. Double dyno from slopers to slopers. Not big but a hard catch.

S0. 4-5m right of cave is a large jug. Looks great to dyno from, actually crimp your way straight up and over.

From cave head out right Traverse along the lip of the block and keep going to the no hand rest start of LF just above the tide line. Works the same in reverse good fun dry climbing.

FA: Jake Noblett & Steve Barker, 2011

S0. Left side of the golden slab, via a nice deep mono to the top.

S1. Climb through crimps to break below roof, traverse left along the break, then move out along side of roof to big move on nose. Later fuckers! Spoken by Doug on a send attempt falling off the last move.

FA: Jake Noblett, 2011

S1. Starting from the right, traverse into the golden face. Move up into the roof via some tenuous rockovers. Traverse right to end of roof and over to finish. Direct finish awaiting an ascent.

FA: Jake, douglas & Steve Barker, 2011

S2. Right of the roof. Up the brown wall to top out the same as Precarious S.L.A.B. Not hard but committing as there is a ledge under the landing (starting ledge). Big push off required if you start to fall.

FA: Jack Folkes, 15 Nov 2014

Did you know?

Did you know that you can create an account to record, track and share your climbing ascents? Thousands of climbers are already doing this.

Selected Guidebooks more Hide

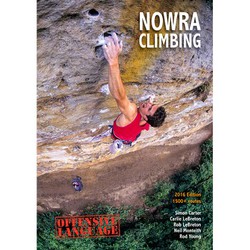
Author(s): Simon Carter, Carlie LeBreton, Rob LeBreton, Neil Monteith, Rod Young

Date: 2016

ISBN: 9780994278449

The new Nowra guide is the most comprehensive guide to one of Australias largest sport climbing destinations. Coincidently it also includes New Nowra or Braidwood Park as it is now known which contains 650 routes in itself. With over 1500 routes all up it will be impossible to run out of projects to get yourself spanked on ever again.

Accommodations nearby more Hide

Share this

Photos Browse all photos

Upload a photo of area

Sun 30 Apr
Check out what is happening in Big Red.

Get a detailed insight with a timeline showing

  • Ticks by climbers like you
  • Discussions of the community
  • Updates to the index by our users
  • and many more things.

Login to see the timeline!

Deutsch English Español Français Italiano 한국어 Português 中文